Online Exam Management
The only software need to manage online exams.
Email: lizarweb@gmail.com
Website: Online Exam Management
Beautifully Designed and Intelligently Developed Online Exam Management for Best User Experience
Email: lizarweb@gmail.com
Website: Online Exam Management
PHP Version: 7.4
Composer
Mysql 8 ^
Server: Apache2
Node -v 12.00.0 and above with npm -v 6.00.0 and above
Online Exam Management is build on laravel framwork. you can manage online exams for students and publish exam results.
Step 1. unzip file
Step 2. change in .env file. Change database credentials, set APP_DEBUG=false, set APP_URL to your website url.
Step 3. chmod -R 777 storage bootstrap/cache config/sms.php config/currency_converter.php (terminal command).
Step 4. php artisan migrate:fresh --seed (terminal command).
Step 5.change redirect location to /public in your apache sites configuration.
Step 6.cd /var/www/domain_url_here/public_html && php artisan schedule:run >> /dev/null 2>&1 (add this to your cronjob).
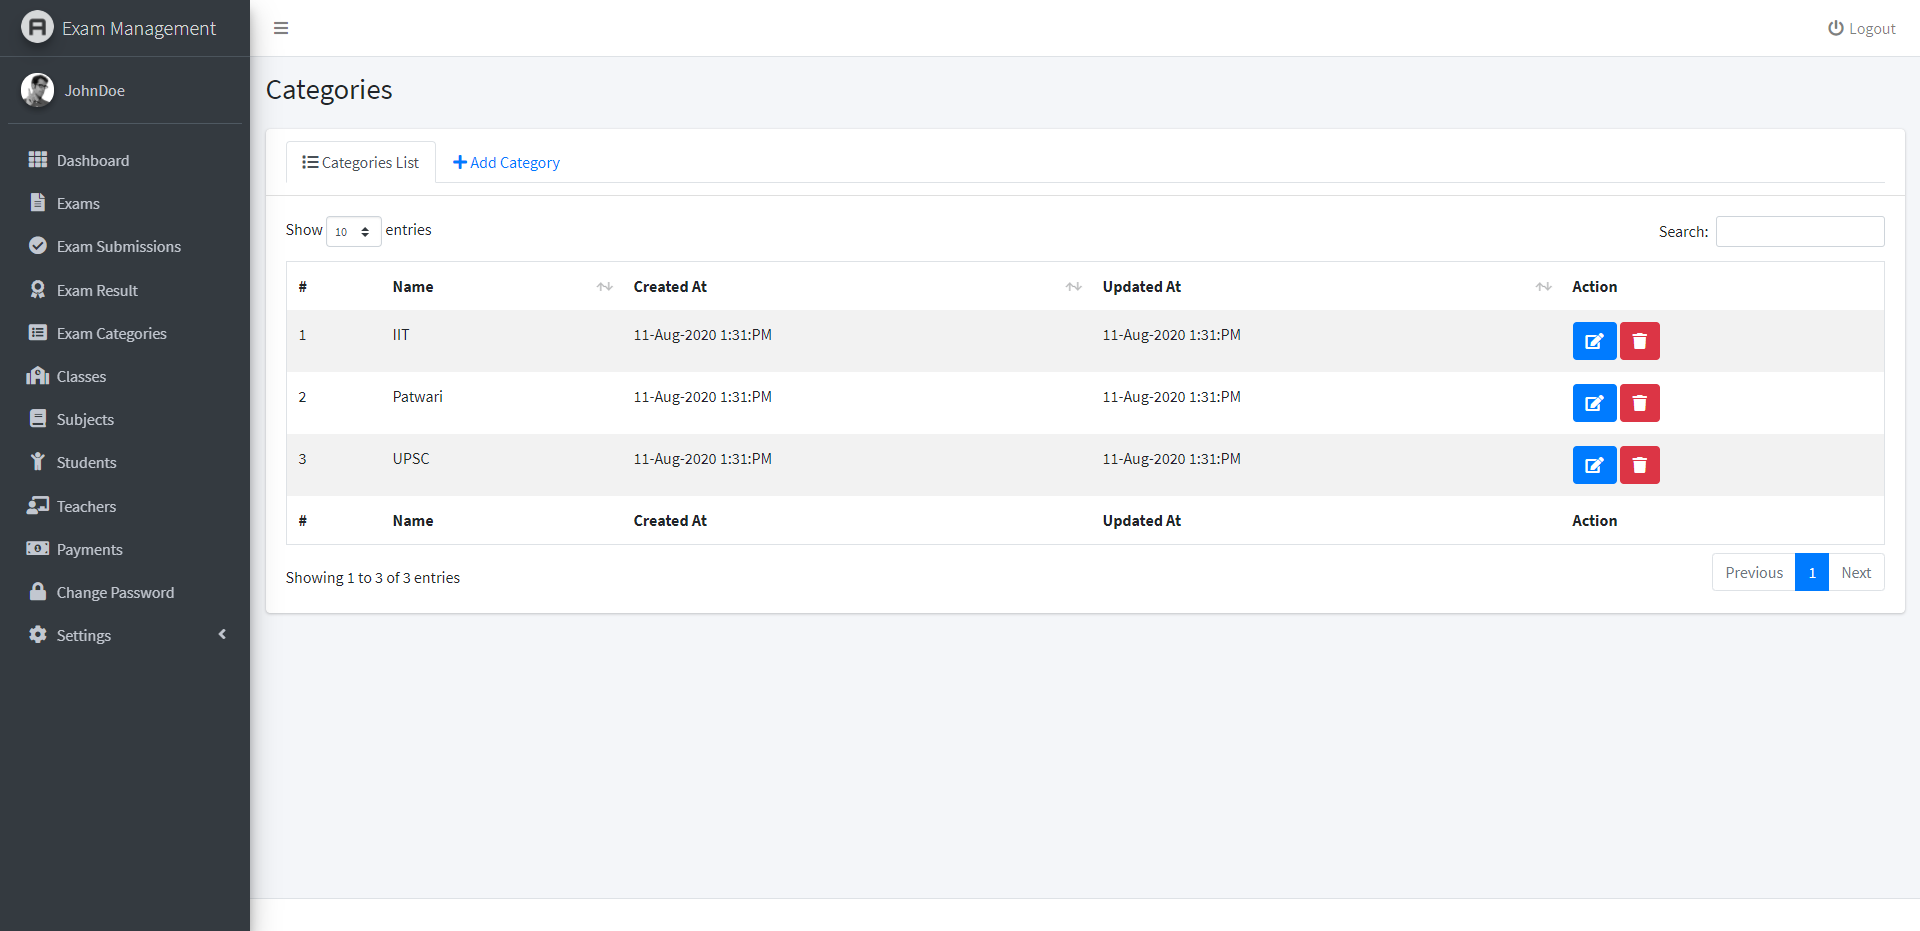
Here yo can add exam categories and also view them.
Here yo can add classes and also view them.

Create exams, set exam center, duration, date and start time. Manage students and assign roll number to each student.
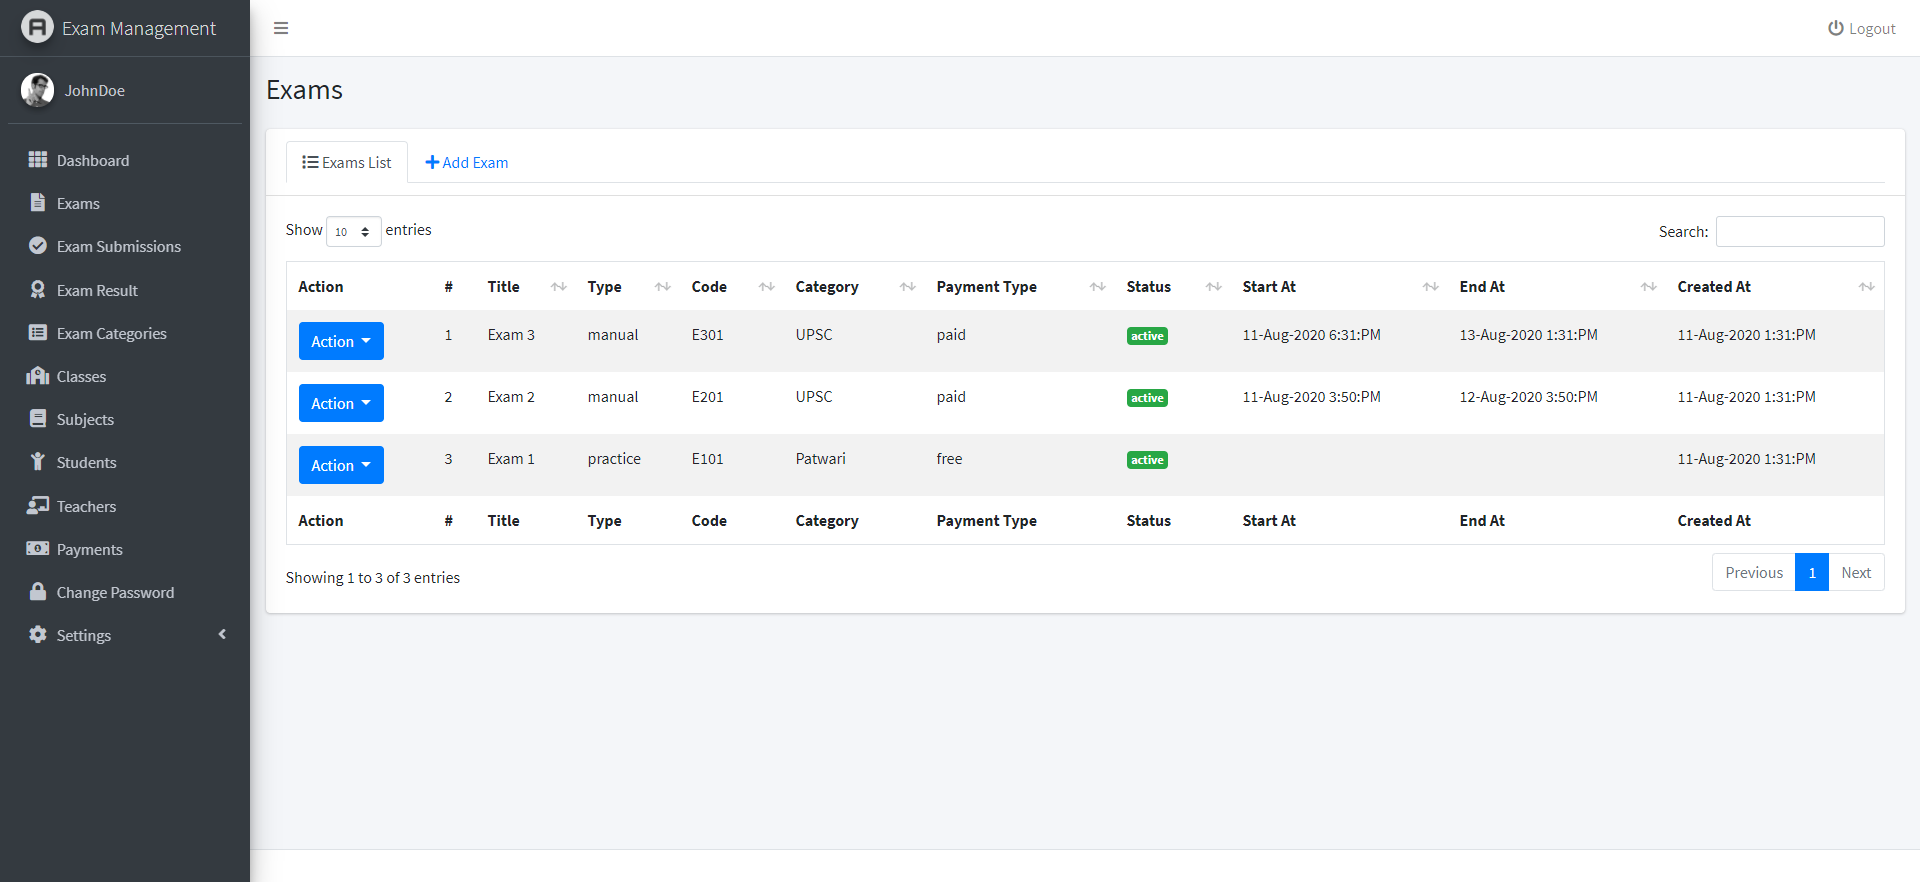
Create any number of exams. View completed exams, recent exams, upcoming exams and on-going exams.
Add objective questions to exam. Set maximum marks, negative marking, options, correct option etc..
Add any number of options for a question and set the correct answer among the options.
Add any number of options for a question and set multiple correct answers among the options.
With subjective questions, student will have to enter the answer in a text area.
Add multiple subjects. Group questions into subject. Set subject order, question order and so on.
Change the order of questions for each student.
Students can browse questions via questions navigation and view answered, unanswered, visited, marked questions.
With centralized start time for the exam. Students can see the time remaining for completion of the online exam.
With centralized start time for the questions. Students can see the time remaining for completion of question
Import students from other exam or from CSV file. Export students to CSV file.
Students can select an exam, enter roll number to view the exam results. Also, control if students can see results immediately after completion of exam.
View complete answer sheet of each student, attempted questions, obtained marks etc.
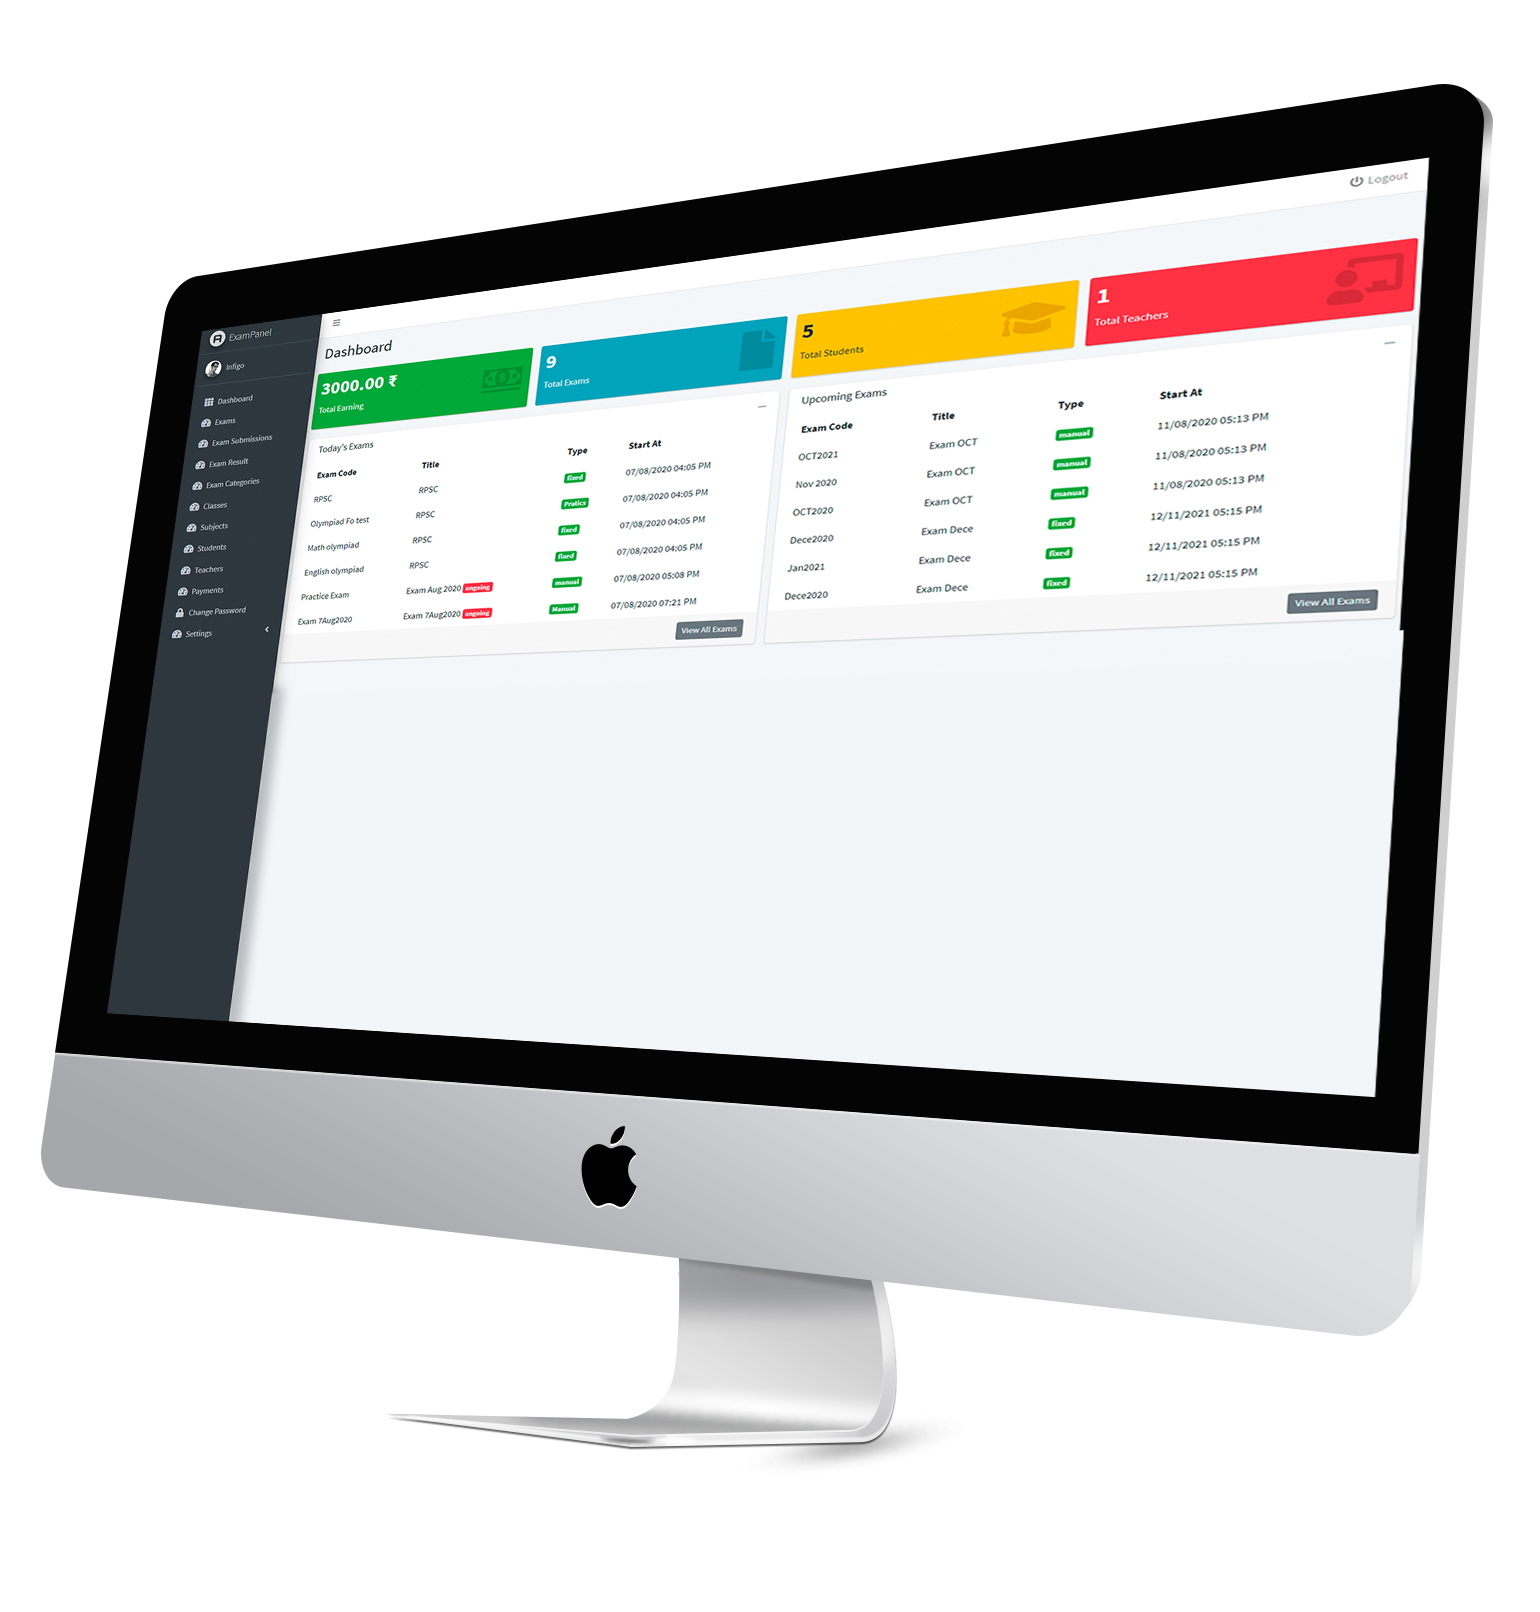
1). Go to the"Dashboard".
2). Here, you can see detail about exams and students.
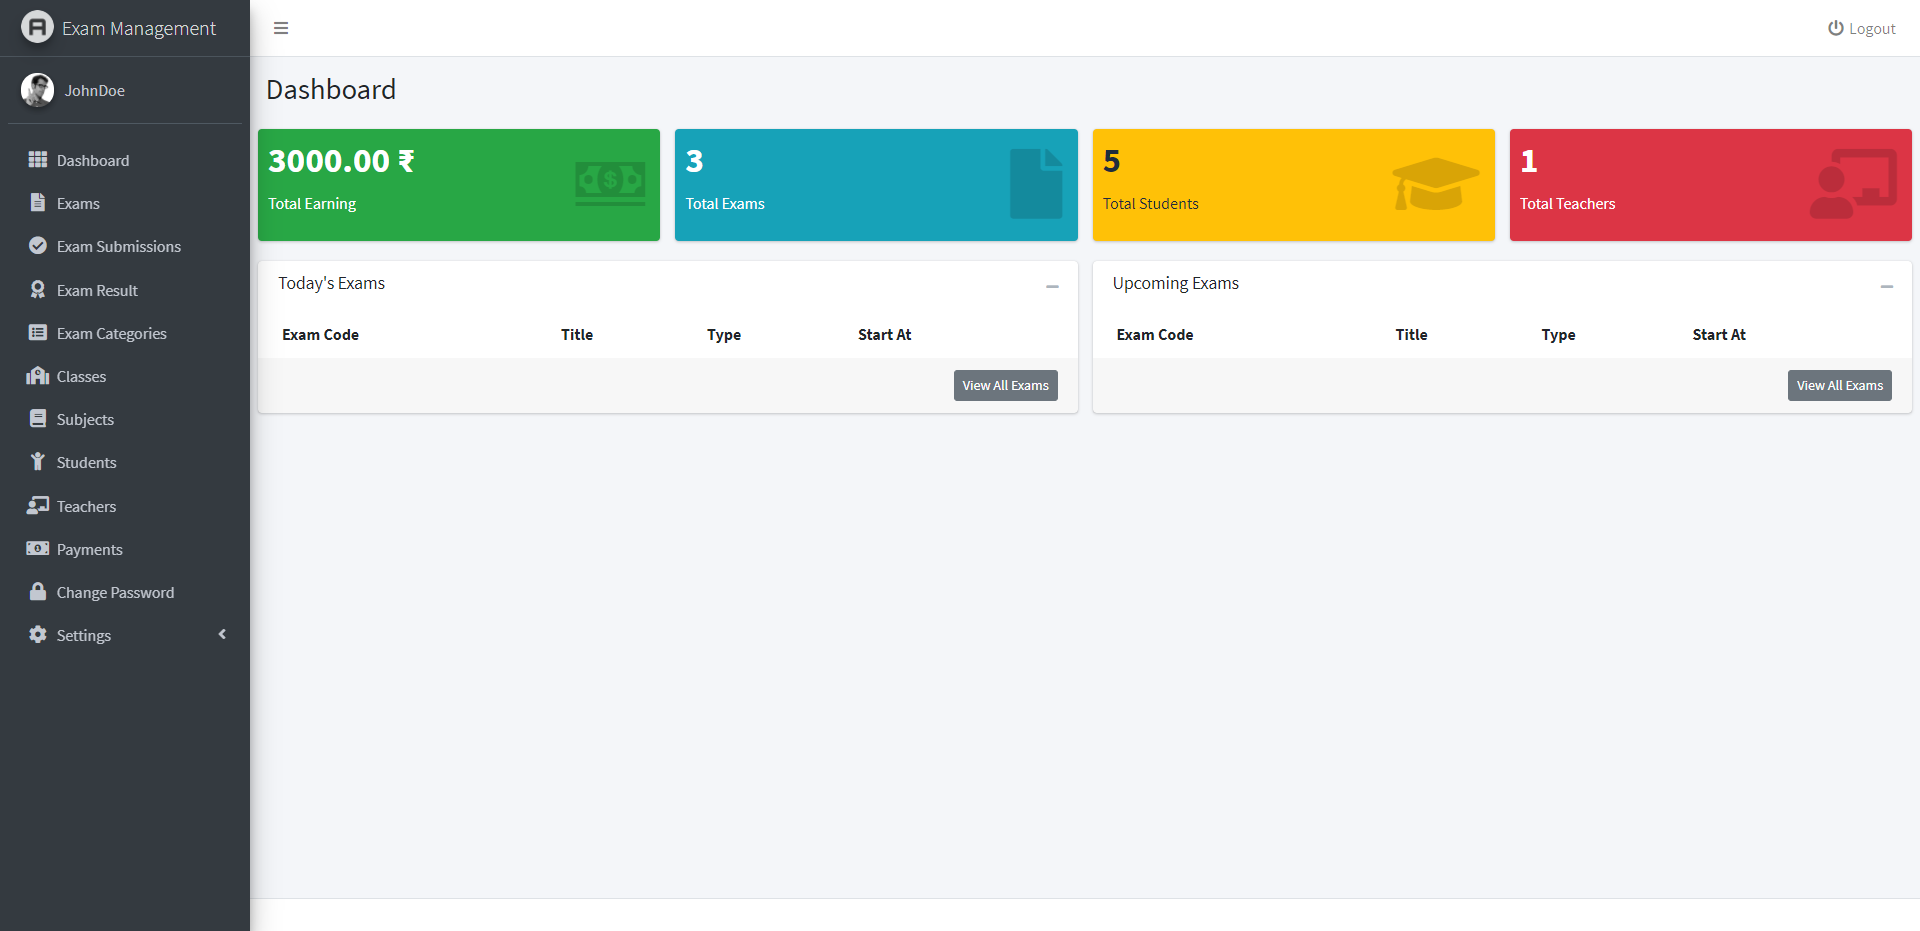
3). Also, you can view stats like total number of exams, completed exams, on-going exams or upcoming exams.
1). Go to "Settings" under "Global Settings".
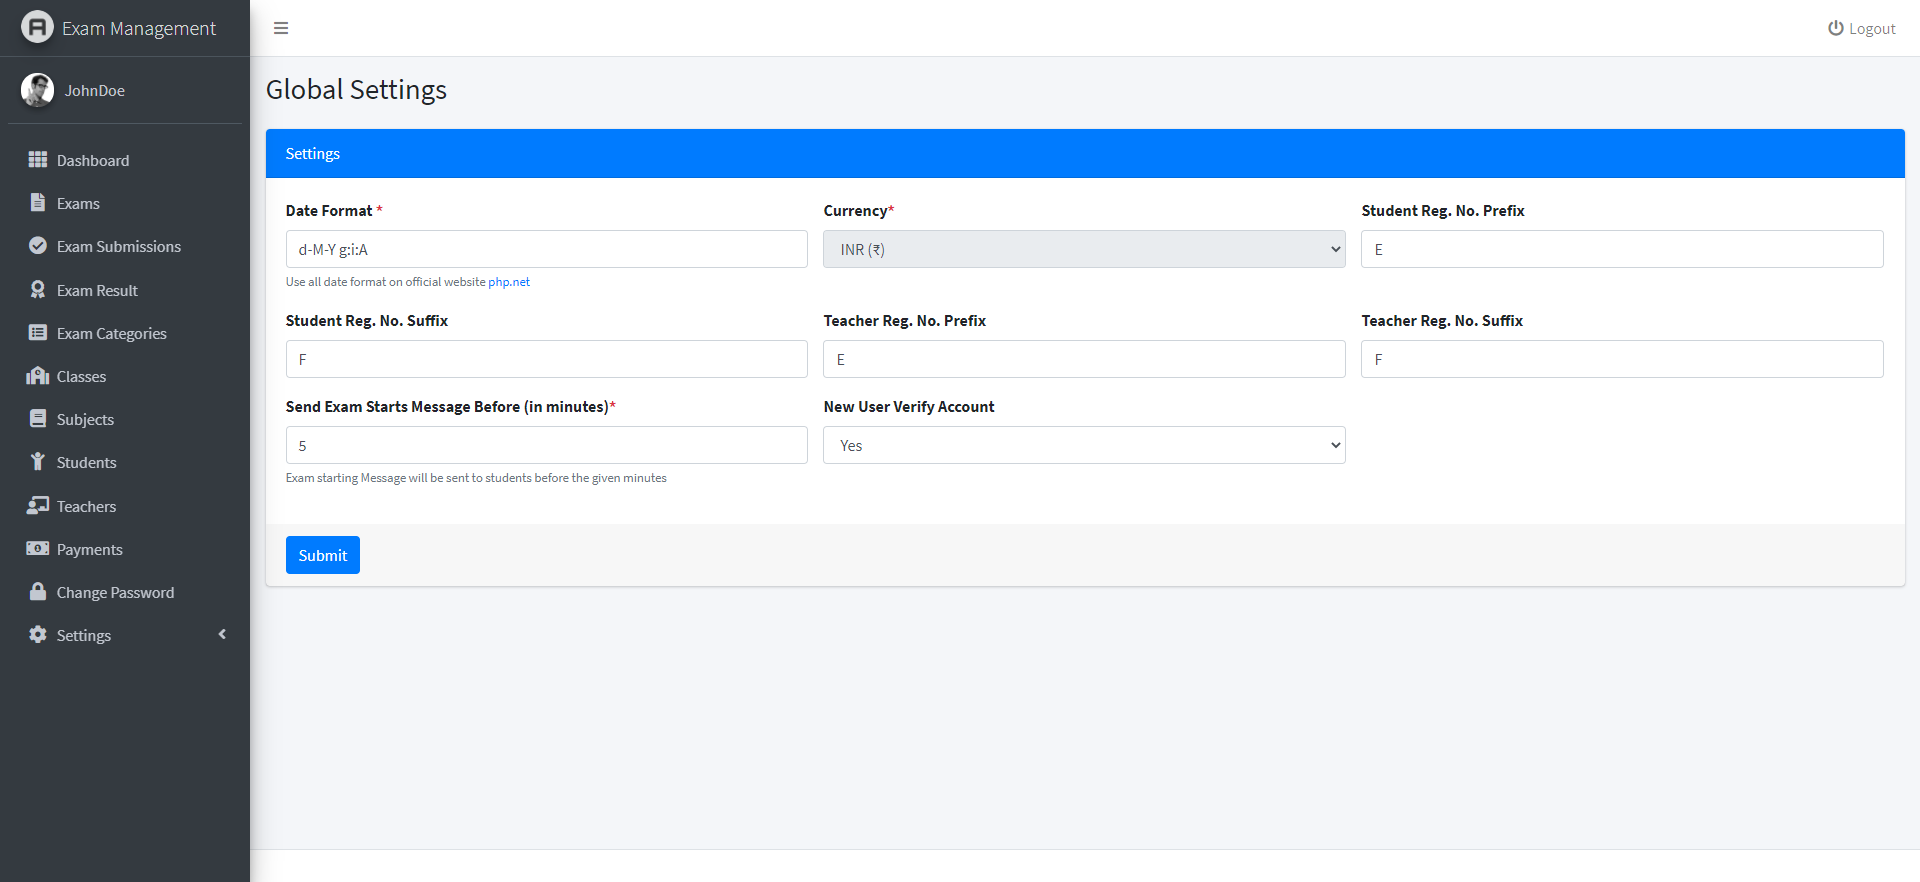
4). Also, you can configure various settings like changing the format of date and time.
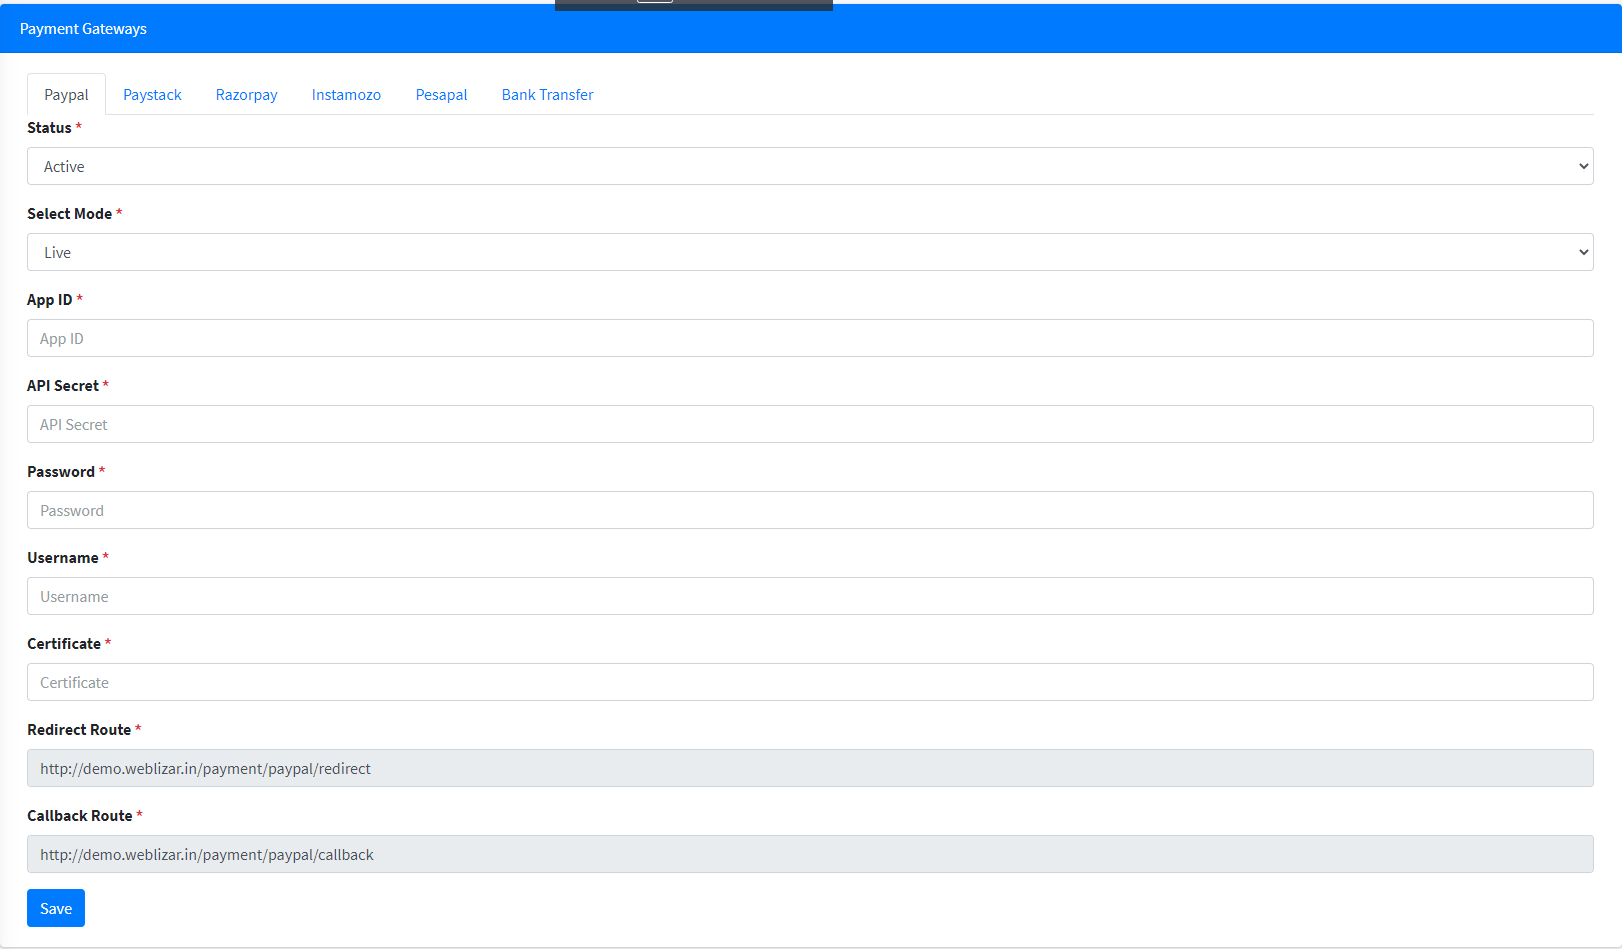
1). Go to "Settings" under "Payment Settings".
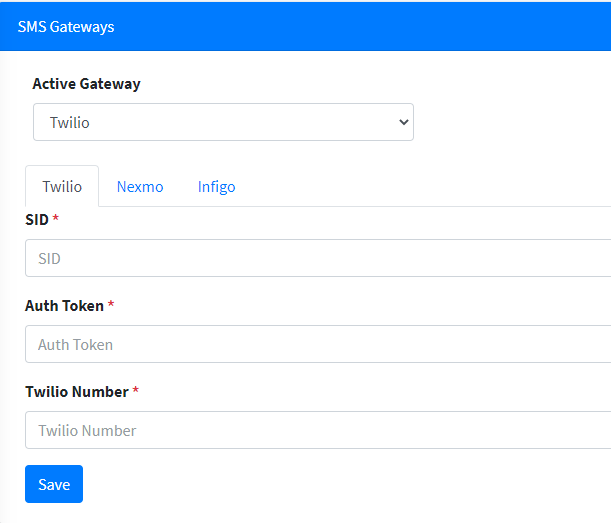
1). Go to "Settings" under "SMS Gateways Settings".
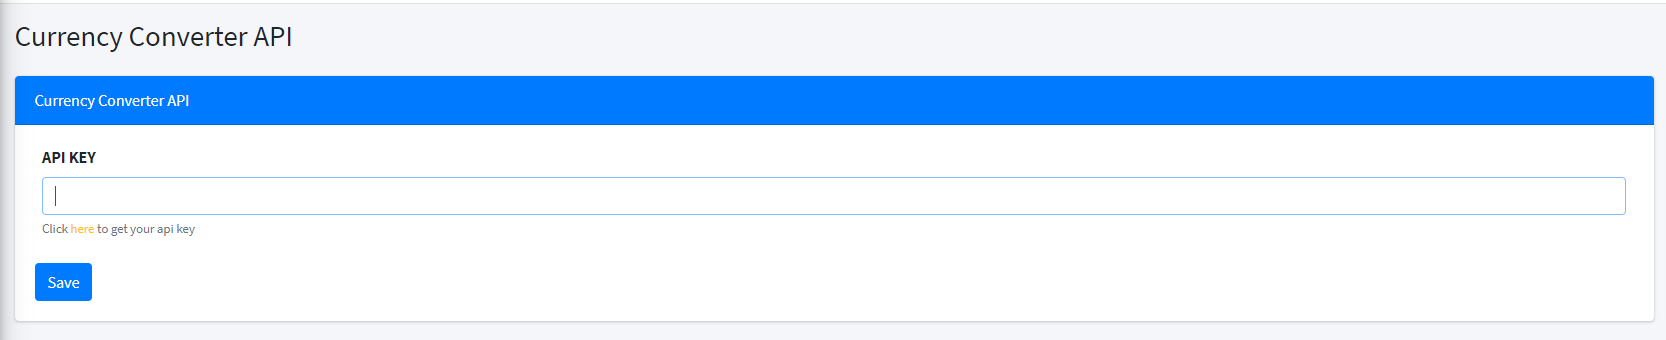
1). Go to "Settings" under "currency Settings".
1). Go to "Settings" under "Mail Settings".
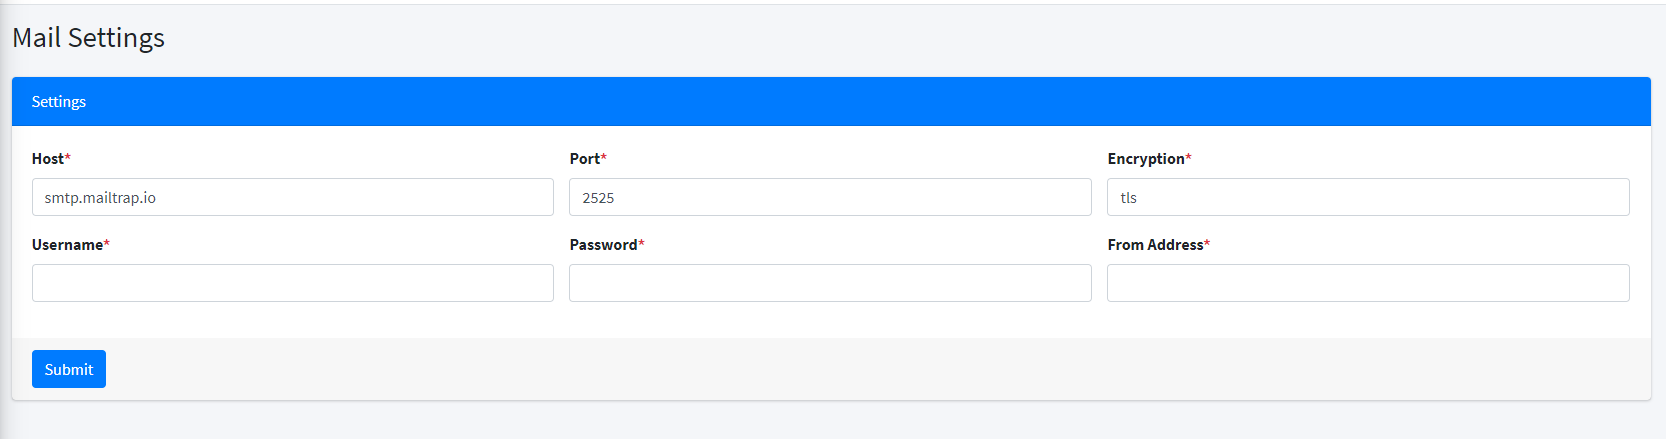
You can either use SMTP email carrier
For example, to use Gmail as SMTP provider, you need to set SMTP host, encryption, port number, username and password.
Host: smtp.gmail.com
Username: Your Gmail account email
Password: App Generate Password of You Gmail Account
Encryption: tls
Port: 587
Lastly, you will need to Enable POP and IMAP. https://mail.google.com/mail/u/0/#settings/fwdandpop
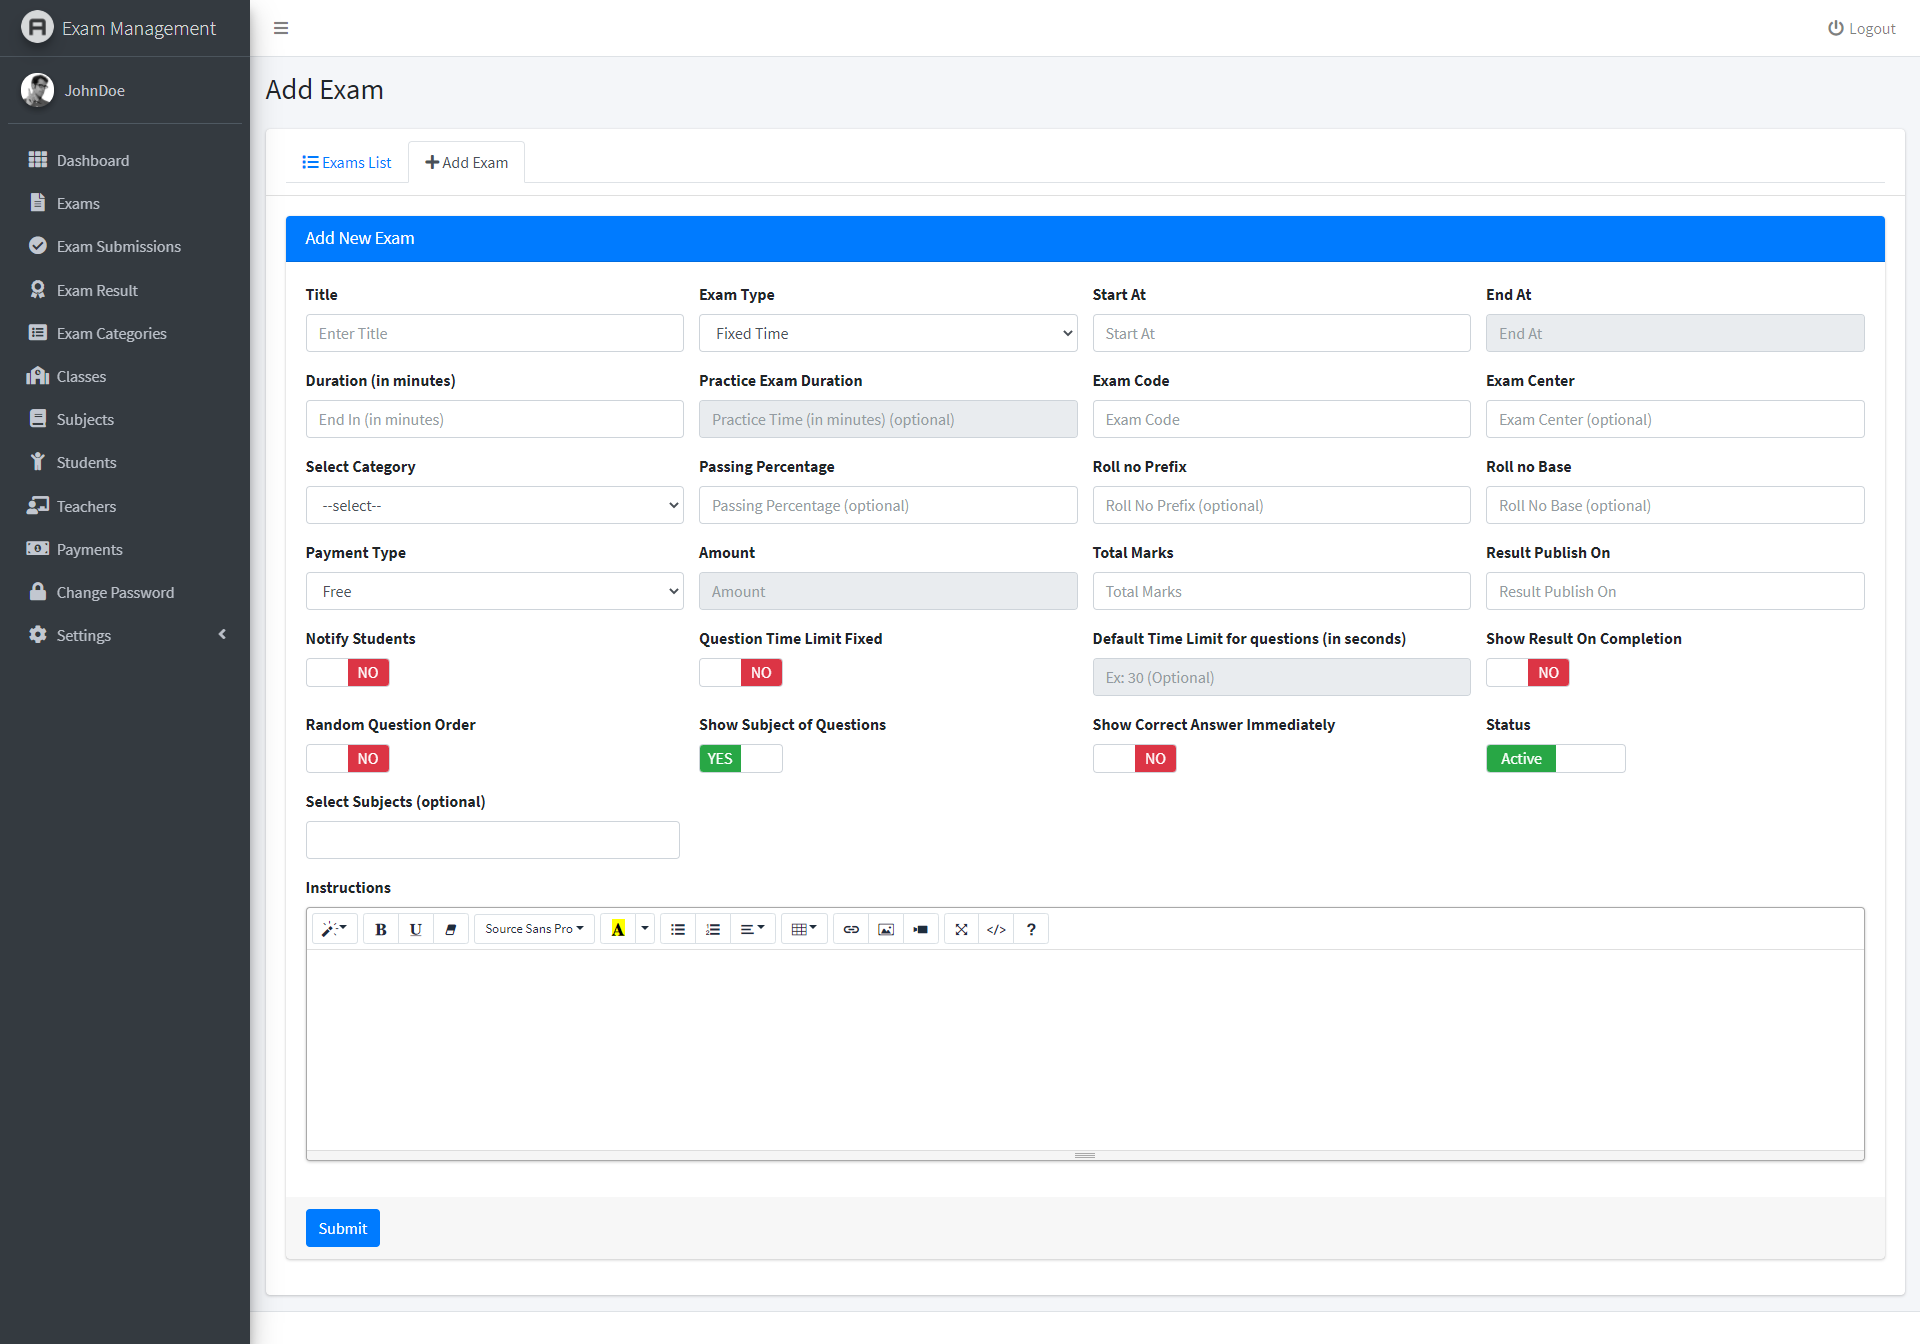
1). Go to "Exams" tab. Click on "Add Exam" button.
2). Here, you can create a new exam by specifying exam date and time, exam center, duration, instructions.
Here, you can view the list of all exams and their status. Also, you can edit them, manage subjects or questions.

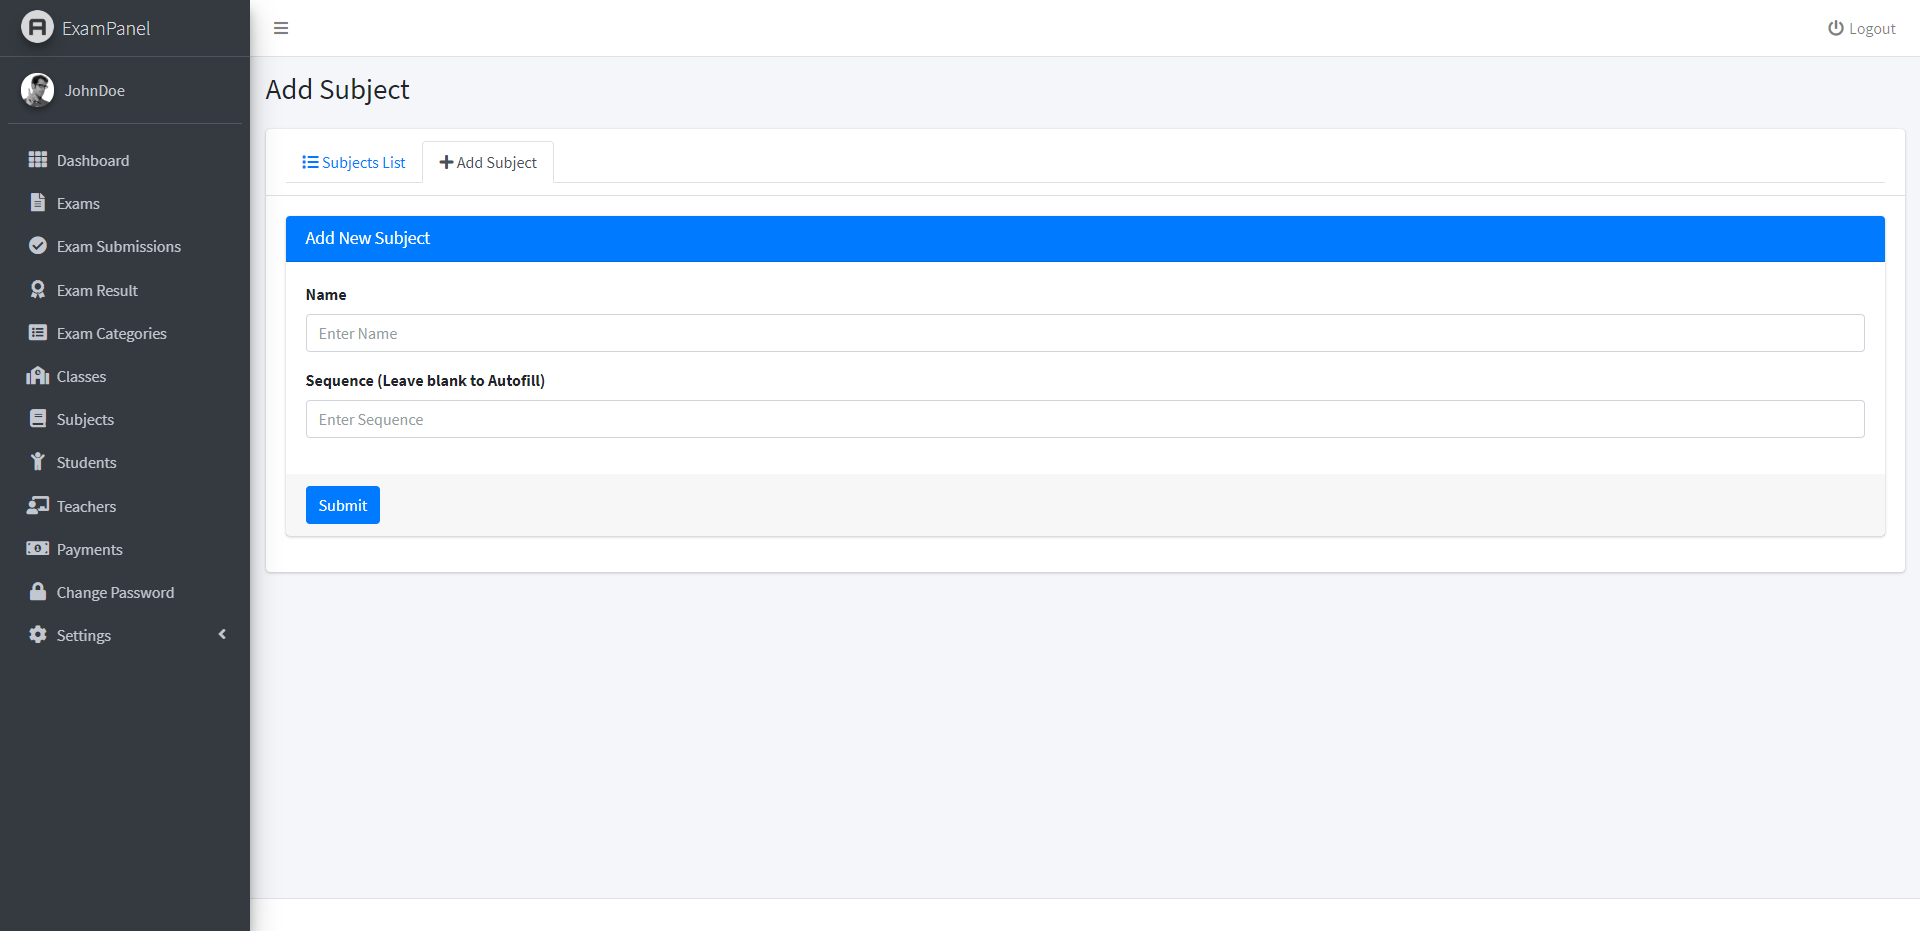
1). Go to "Subjects"
2). Here, you can view all subjects in this exam.
3). Also, you can add new subject, change its order.
4). There must be alteast one default subject in every exam.
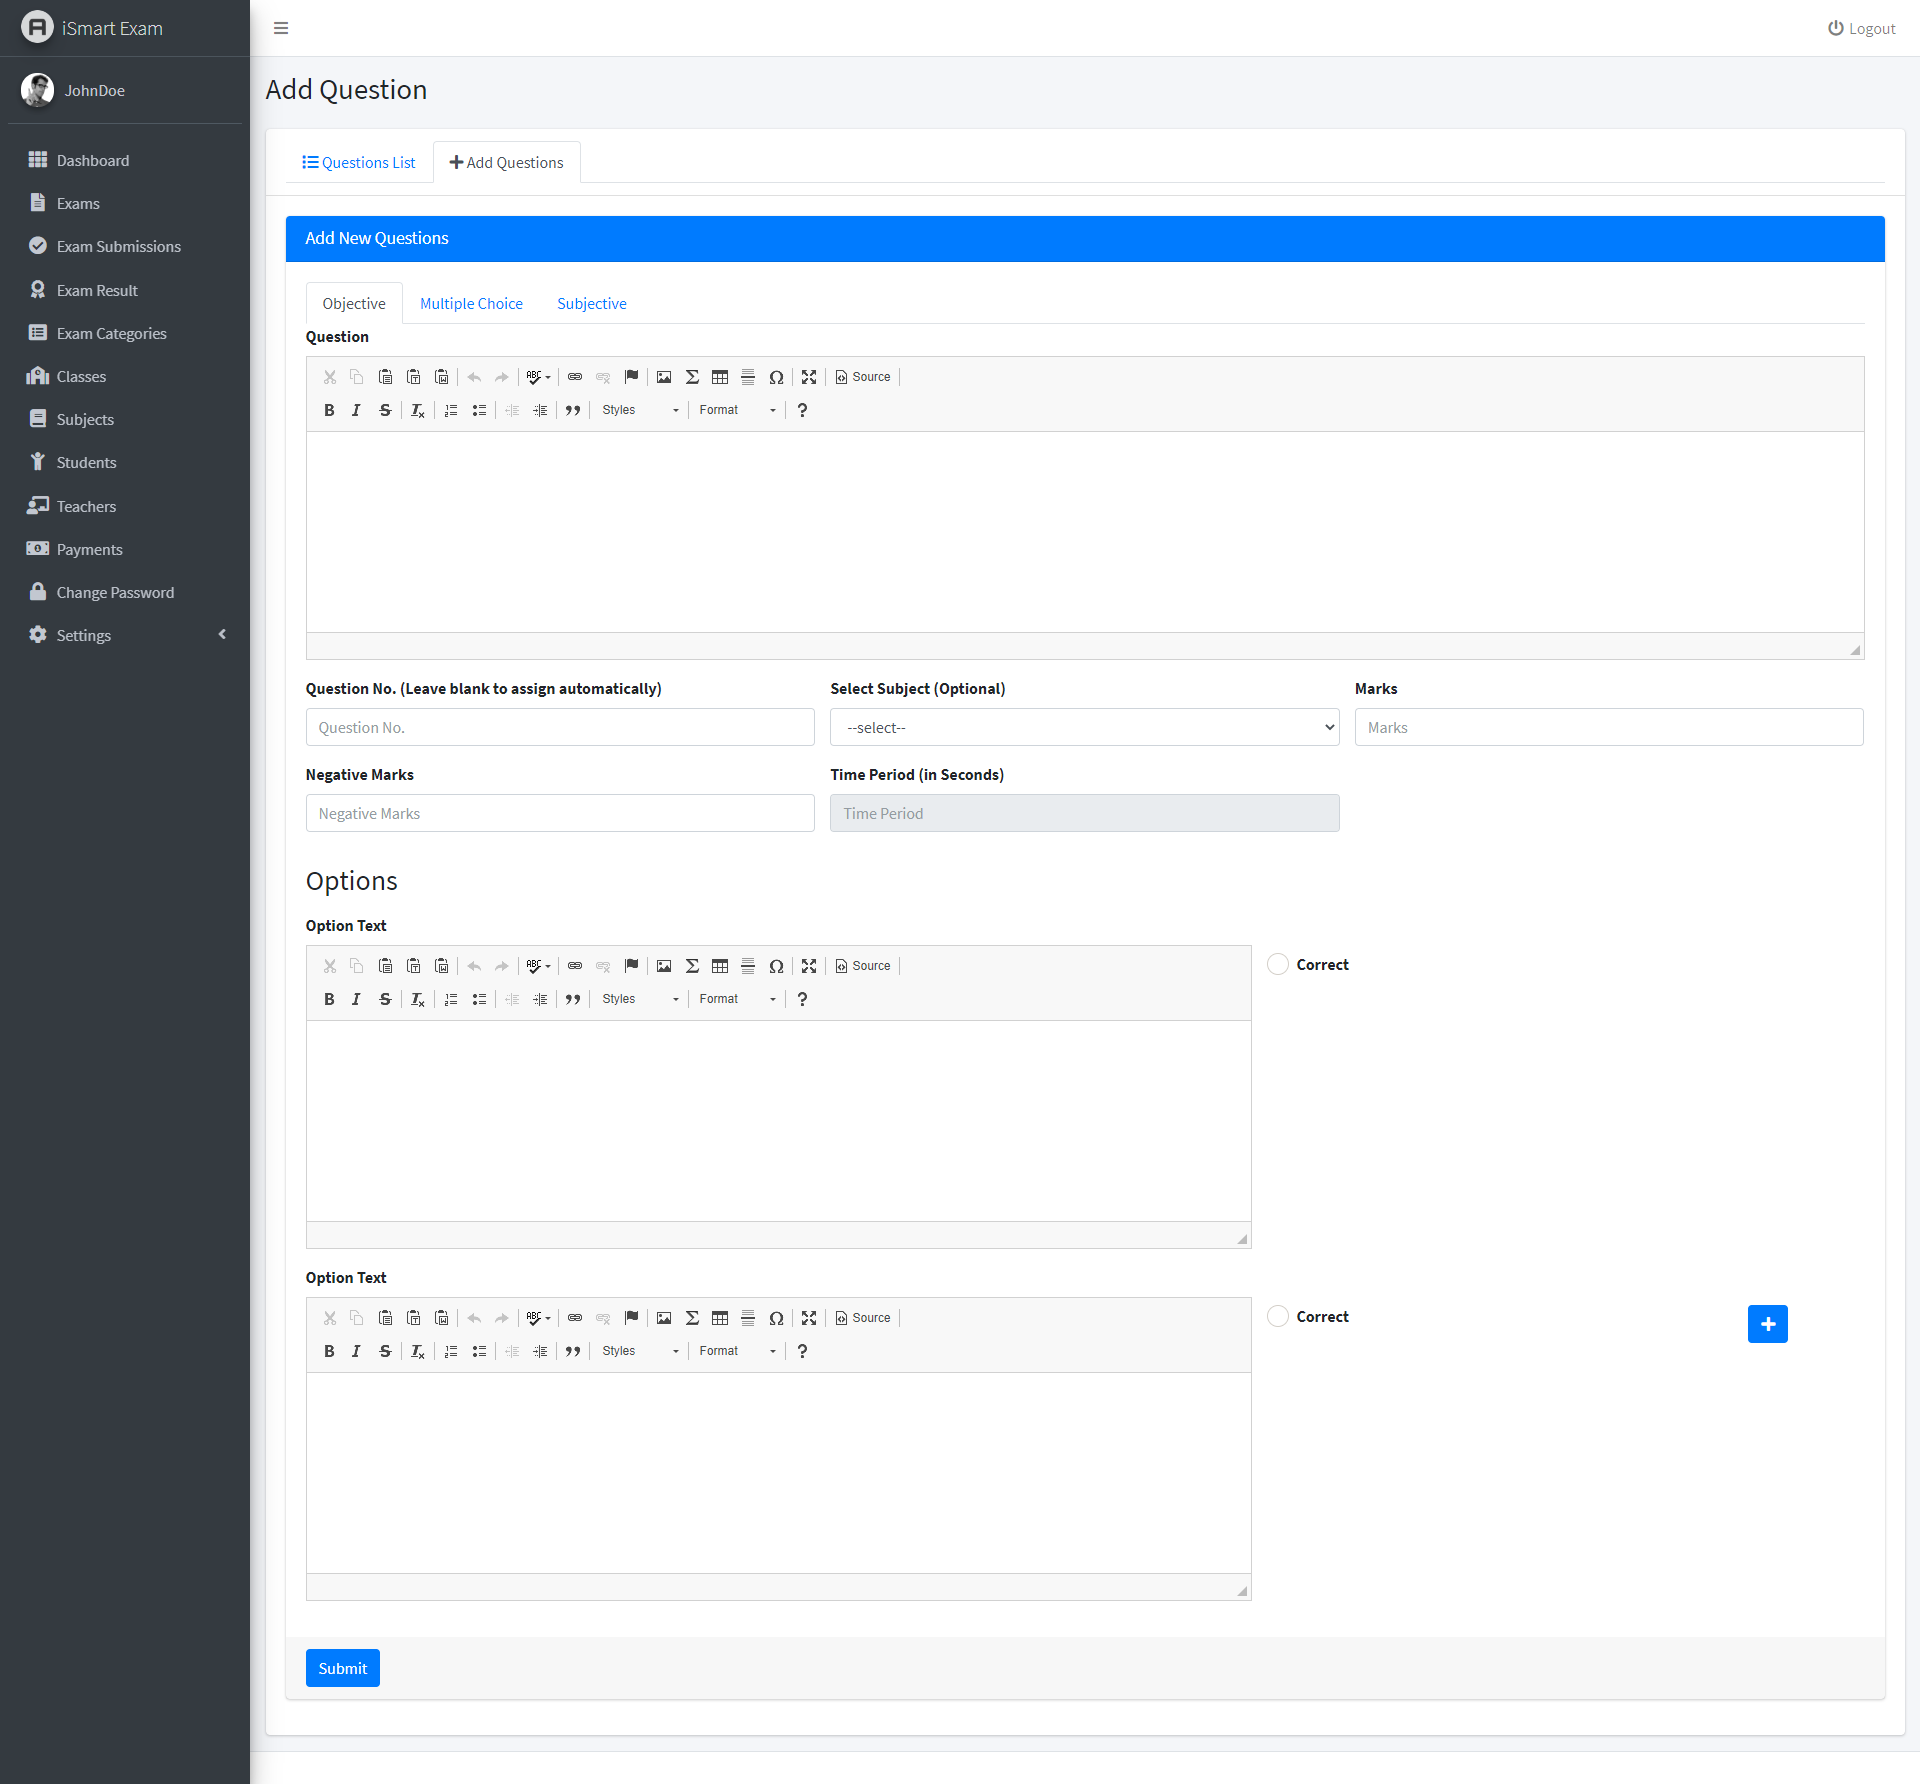
1). Go to "exam" click action exam and select questions
2). Here, you can view the list of all questions in the exam.
3). Also, you can add a new question, set its order in the subject, maximum marks or negative marks for the question.
4). The question can be of objective or subjective type.
5). For objective questions, you will have to set the number of options and correct options.
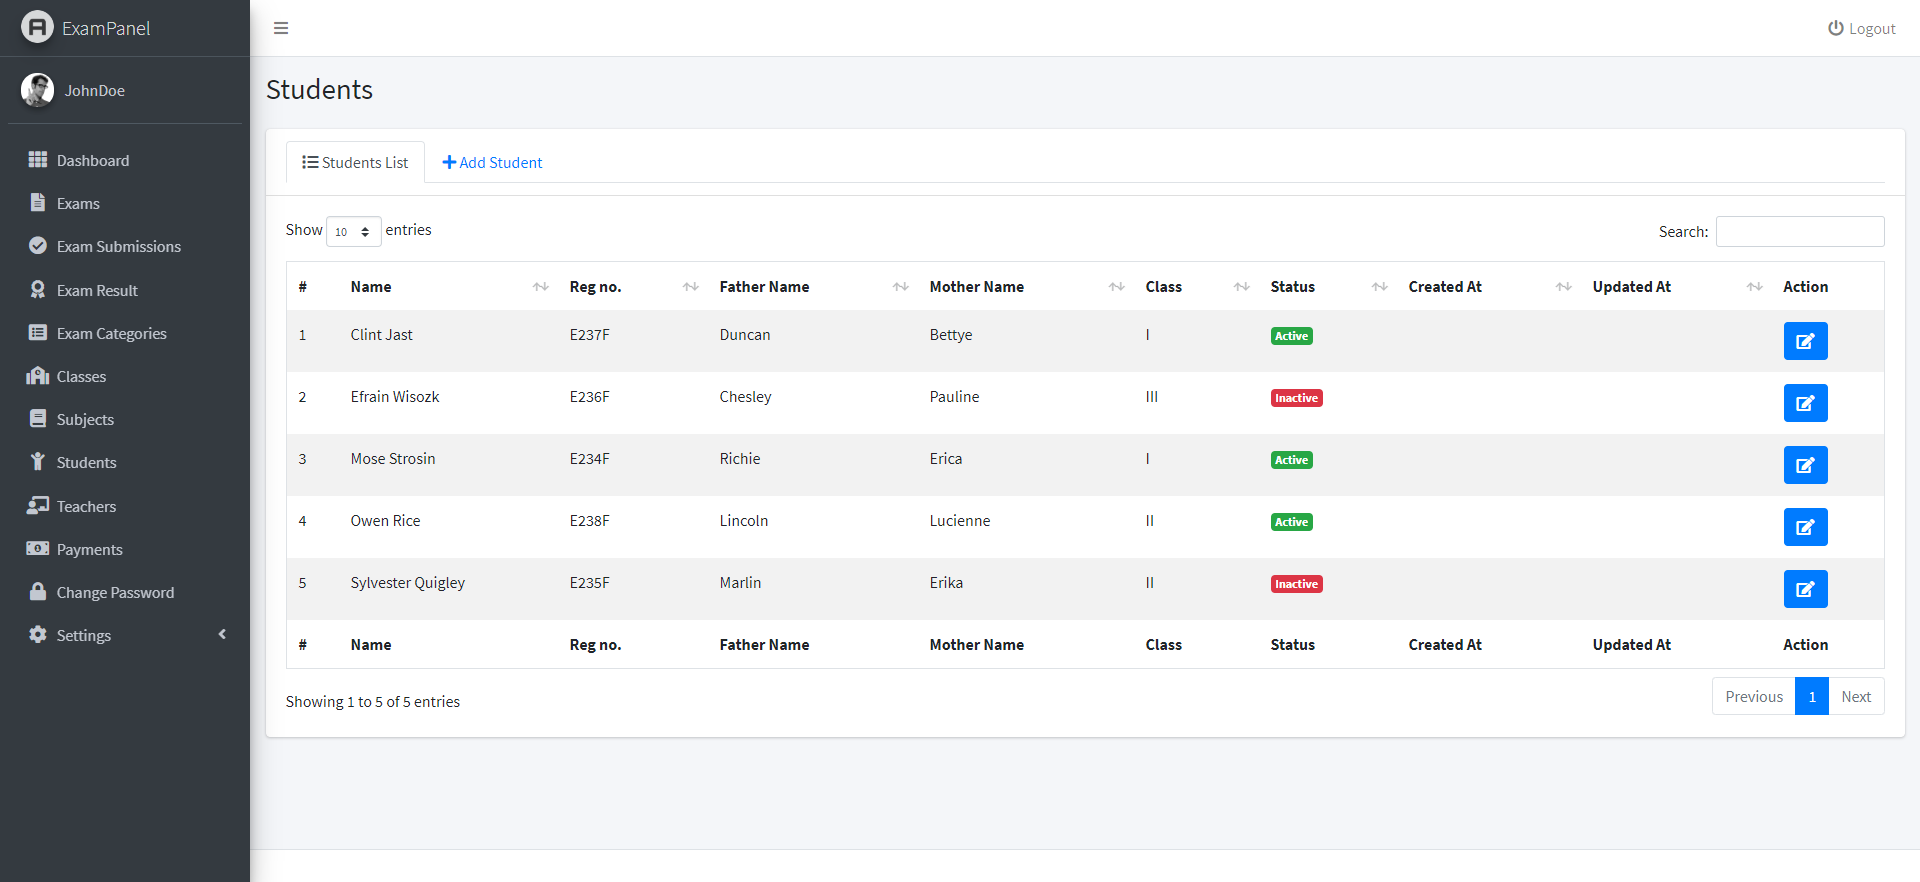
1). Go to "Students".
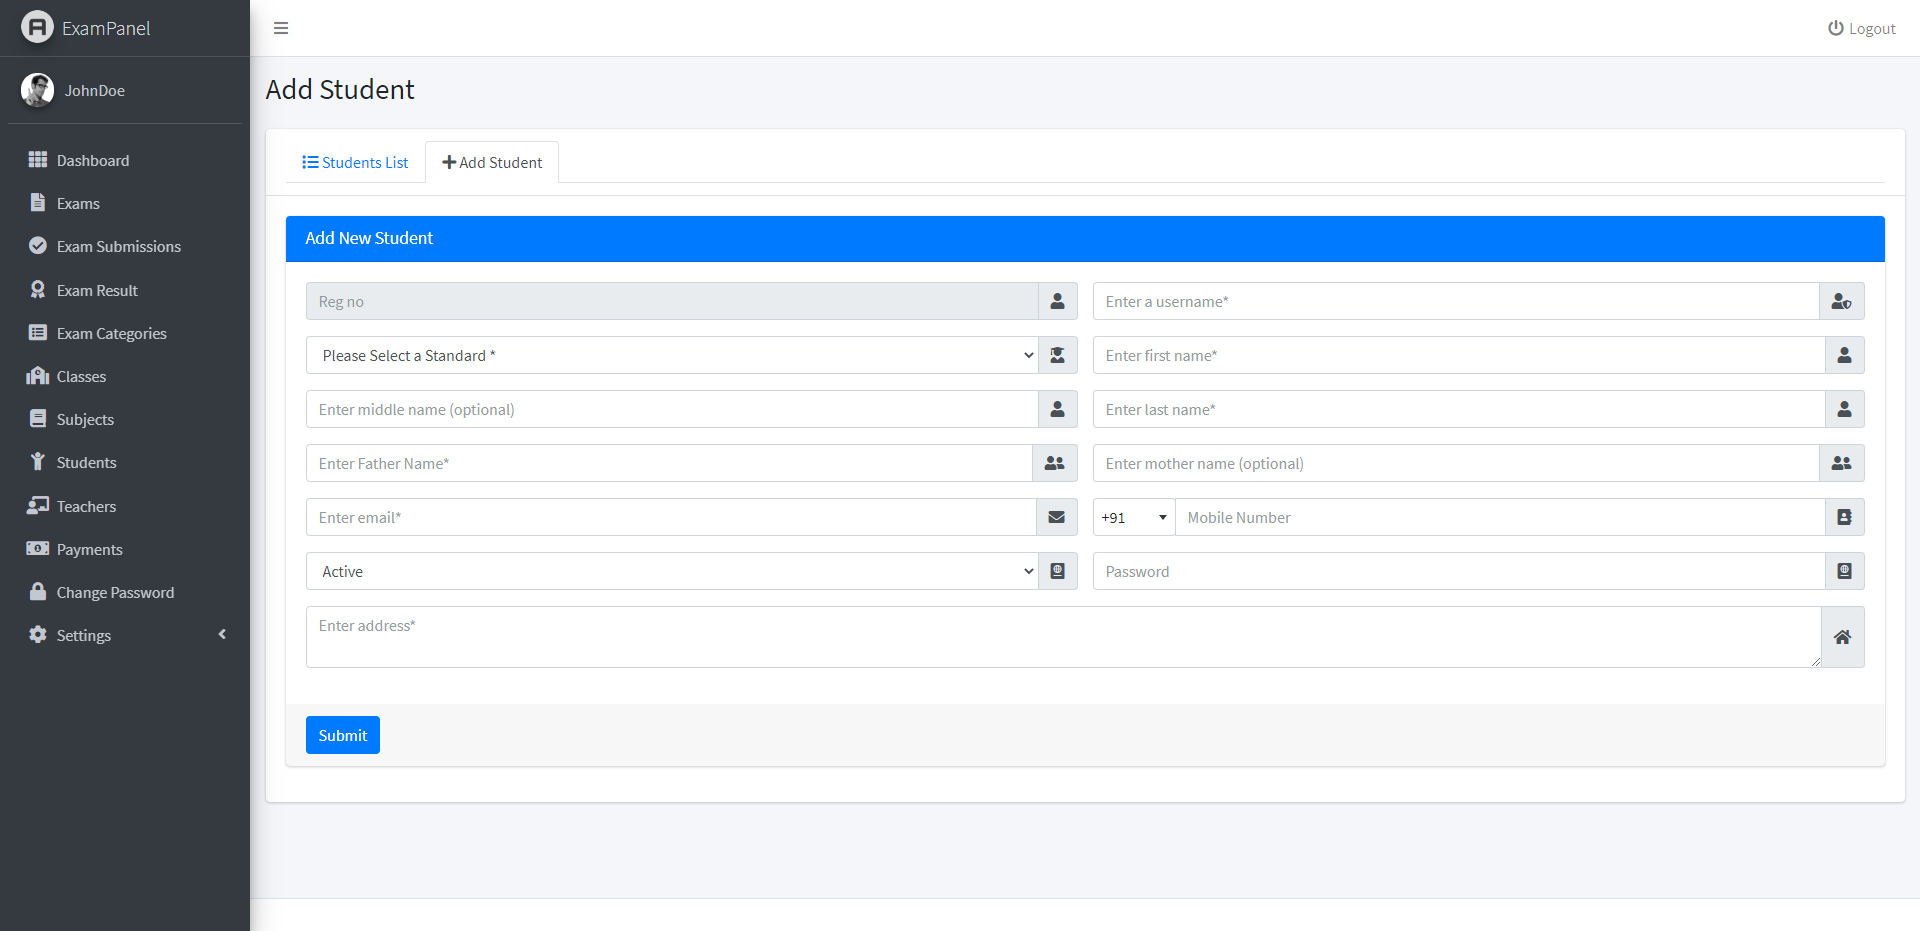
2). Here,the number of students in the exam.
1). Go to "Teacher".
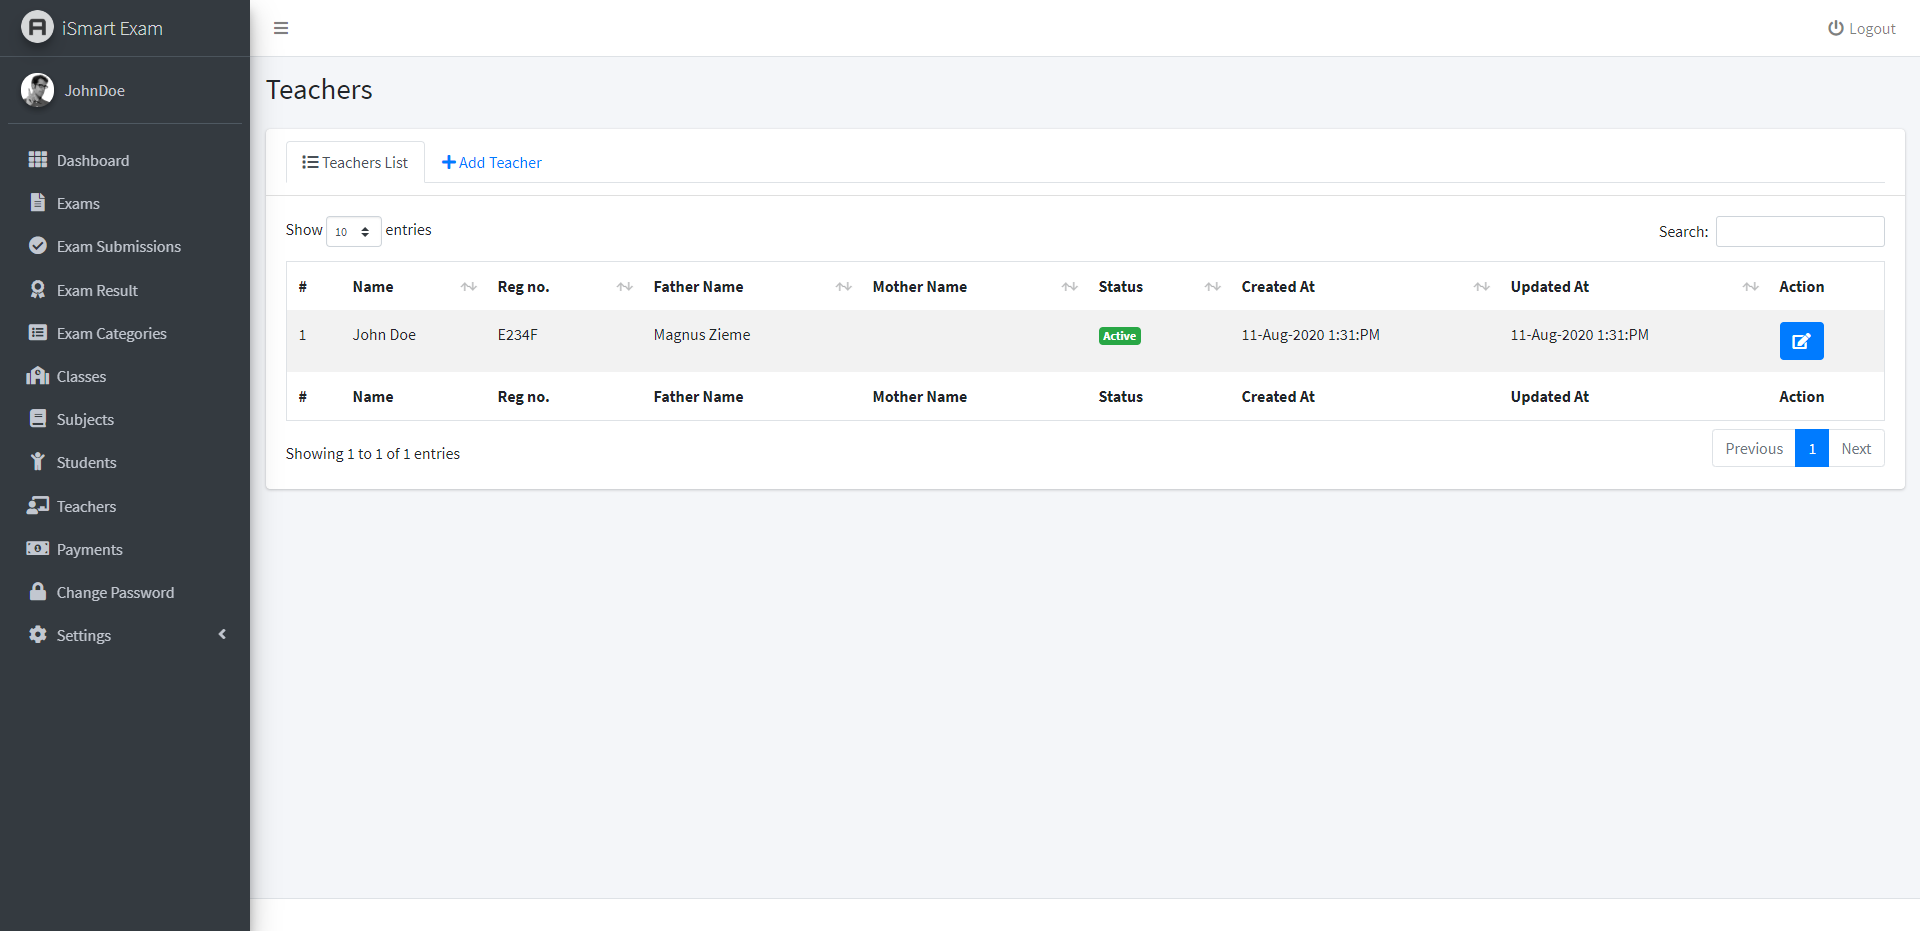
2). Here, the number of teacher in the exam.
1). Go to "Students.
2). Here, you can view the list of all students in the exam.
3). Also, you can add, edit a student.
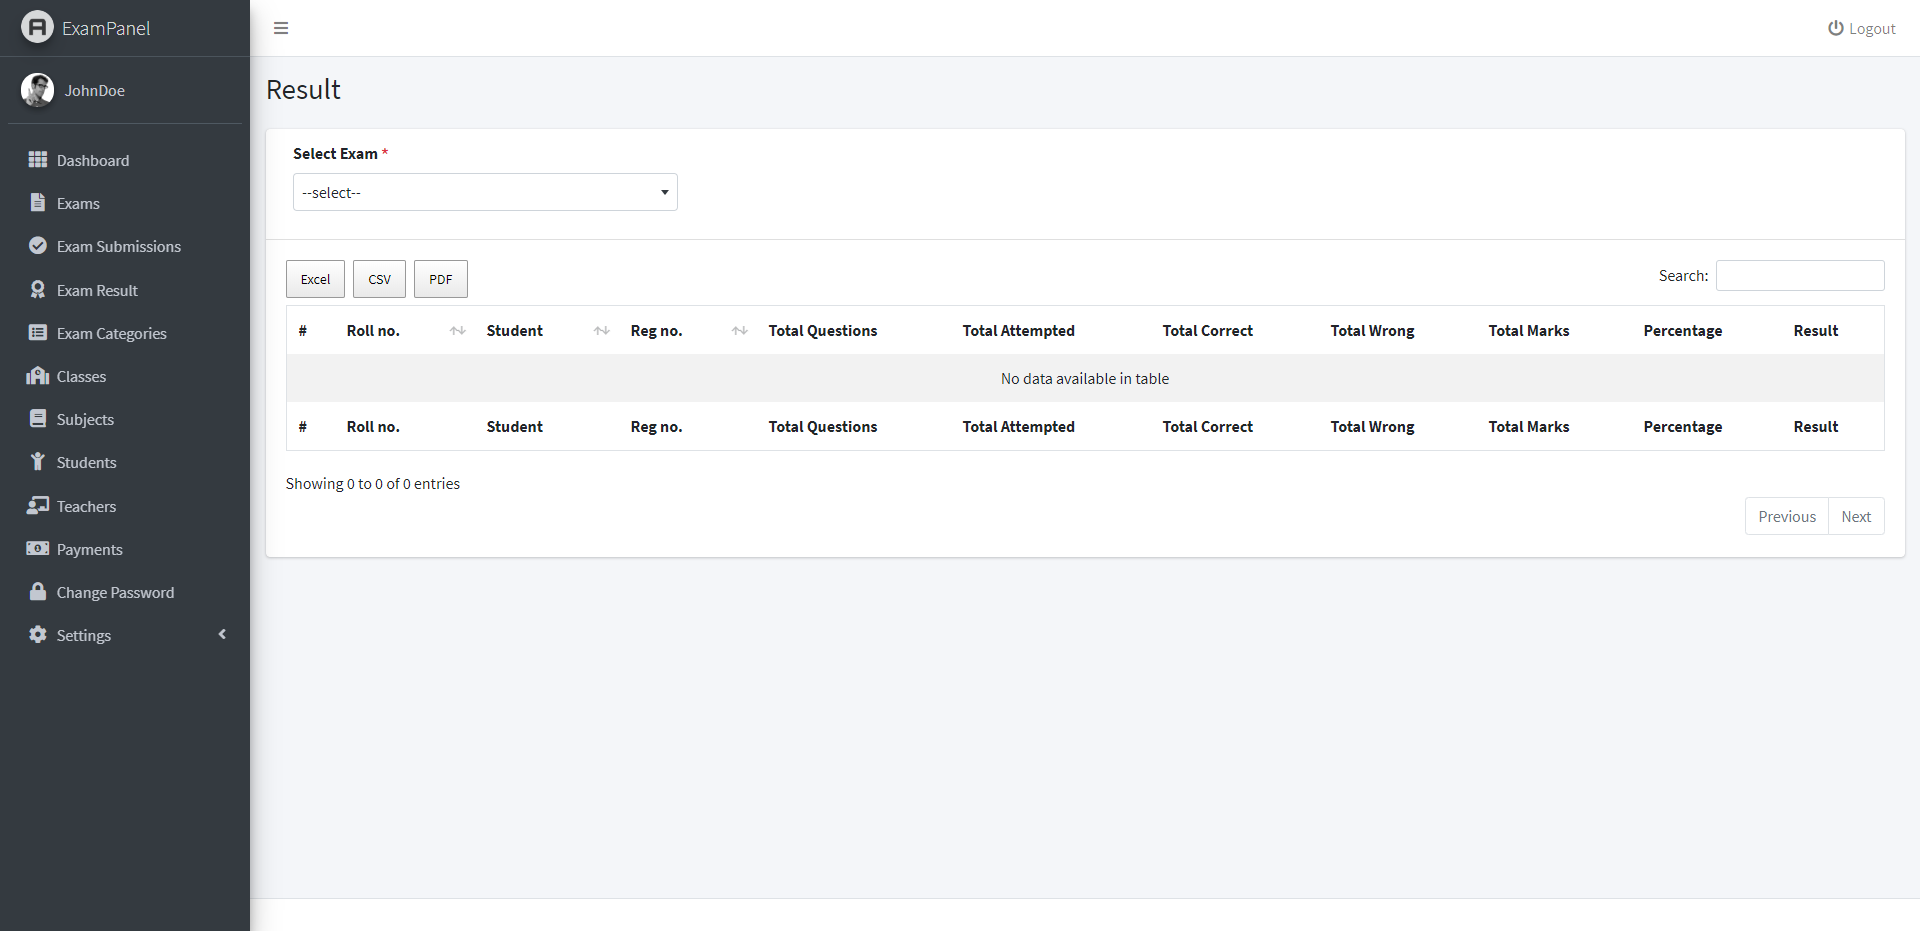
1). Go to "Results" .
2). Here, you will find the exams and their results.
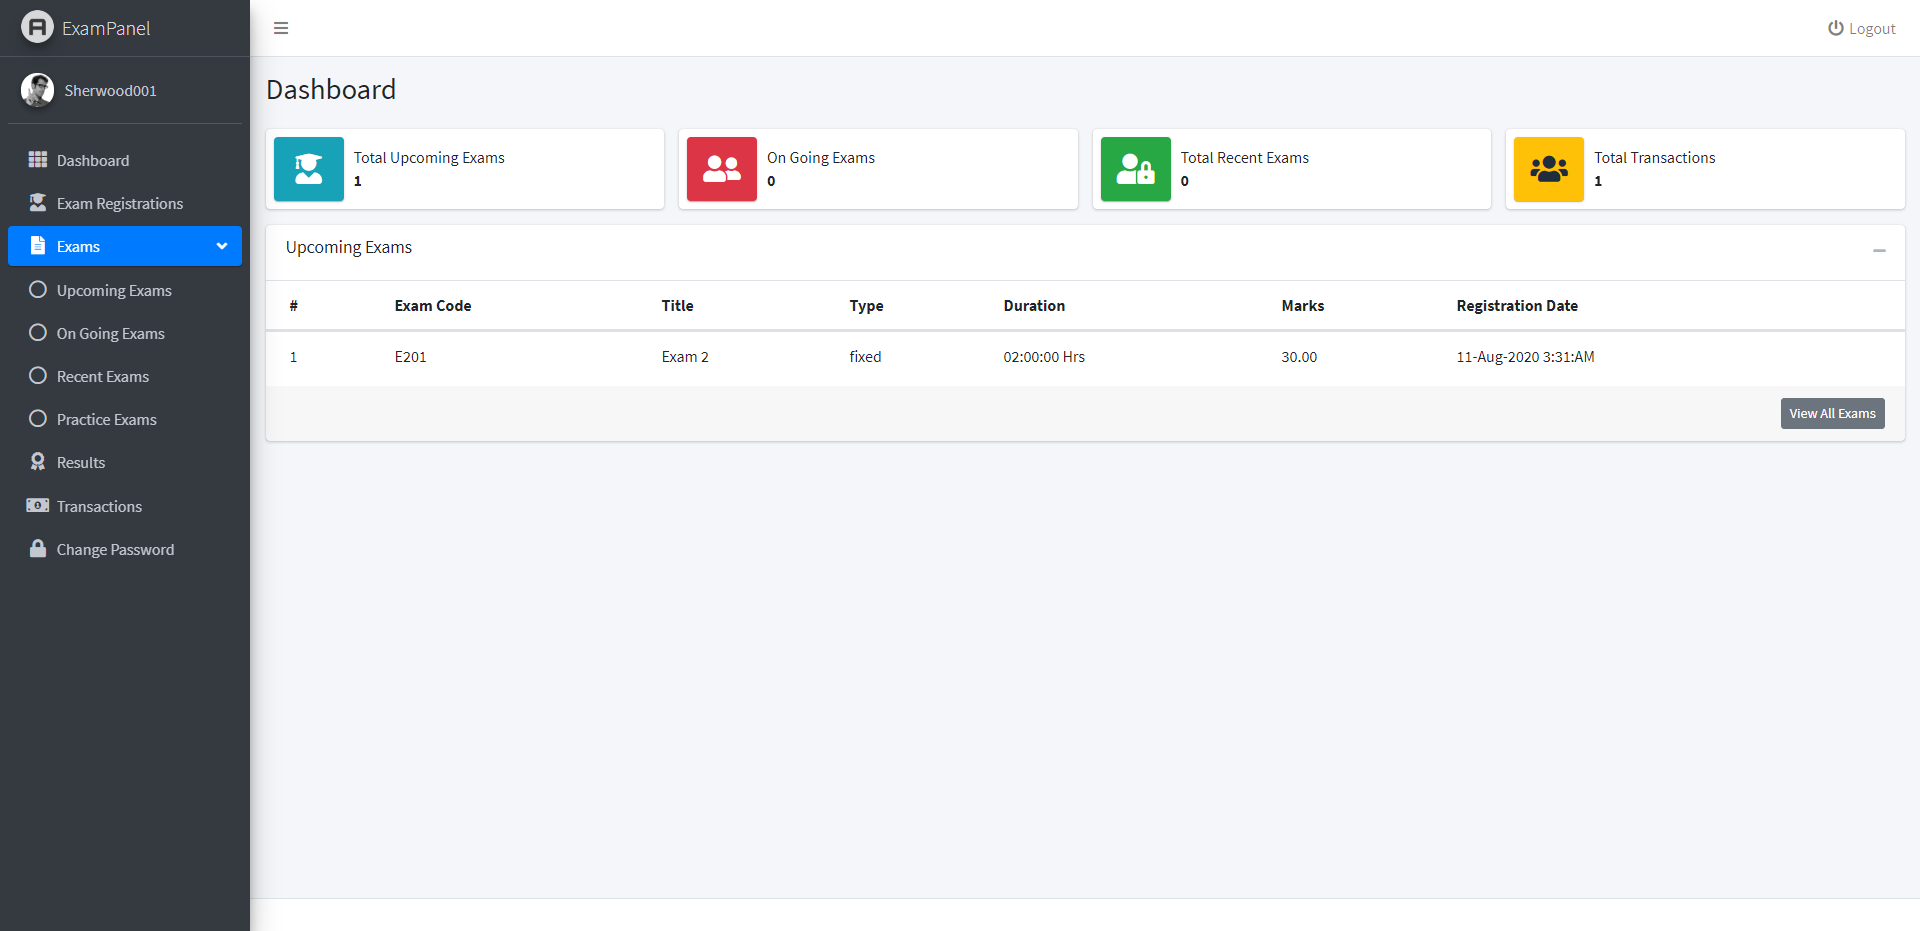
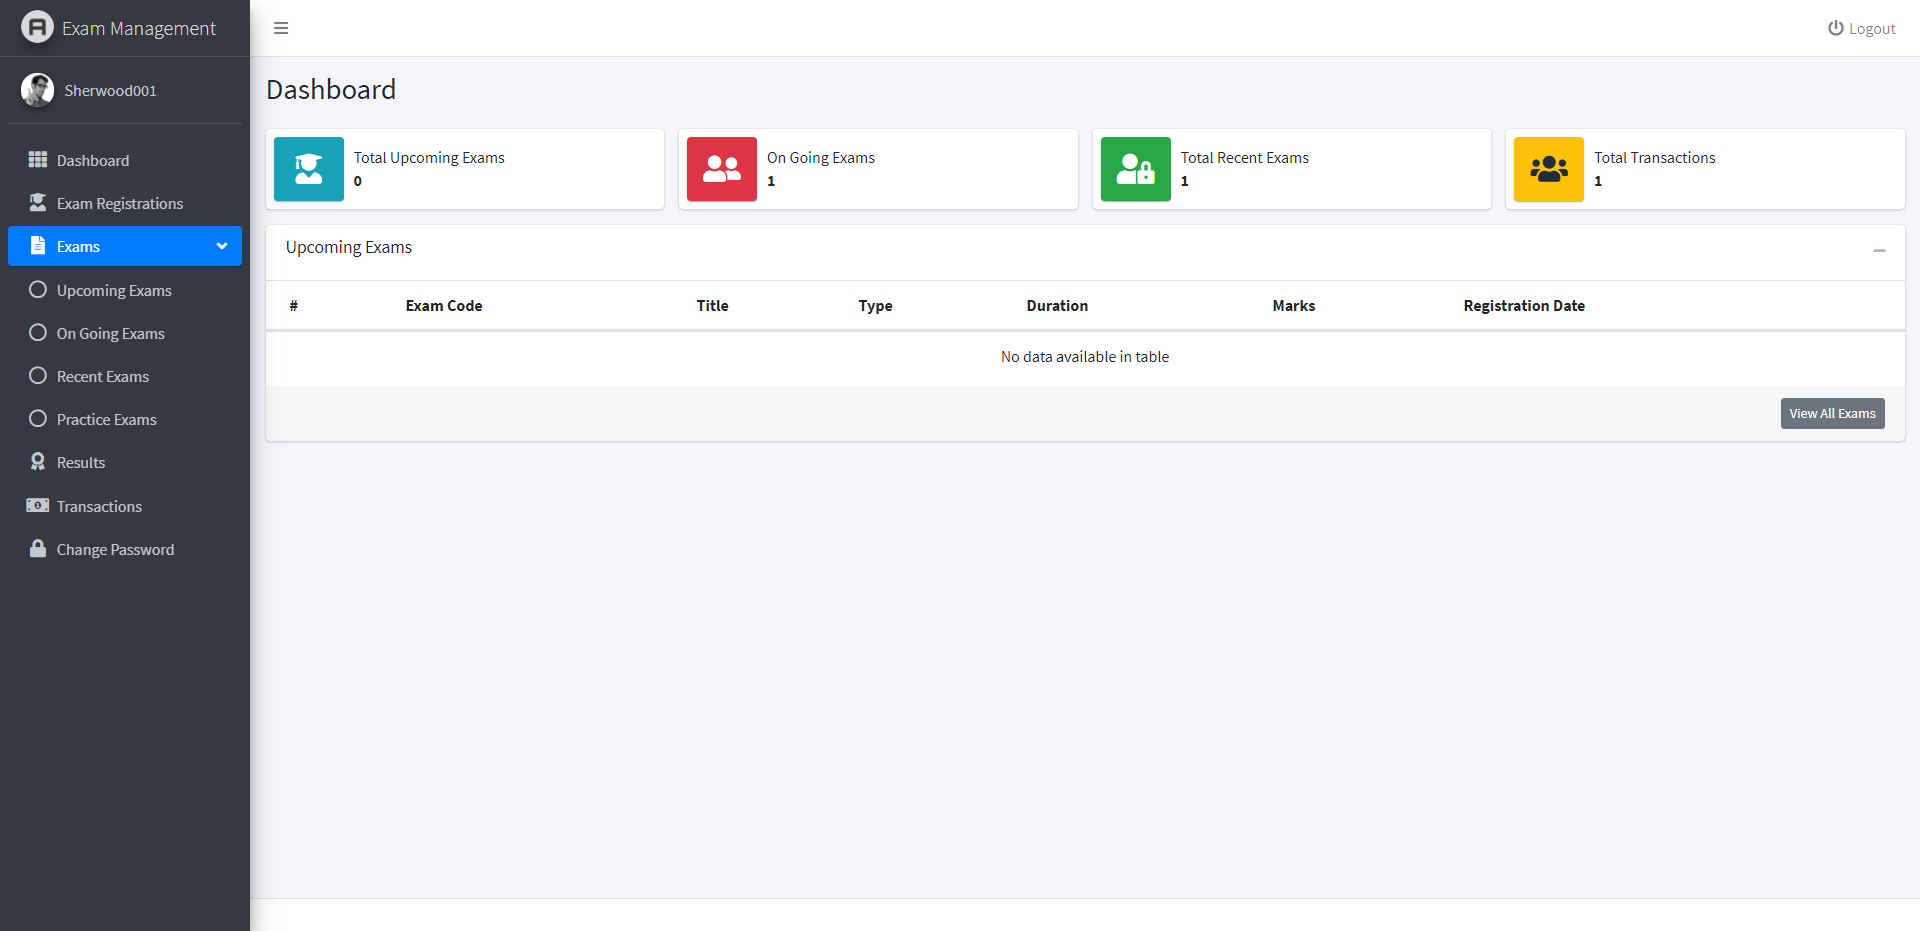
1). Go to the"Dashboard".
2). Here, you can see detail about exams, transaction and students.
2). Here, students can login and take the exam.
Here you can see Students updcoming exams and ongoing exams
1). After login, the students can read the exam instructions.
2). Also, time remains for starting the exam will appear on this screen.
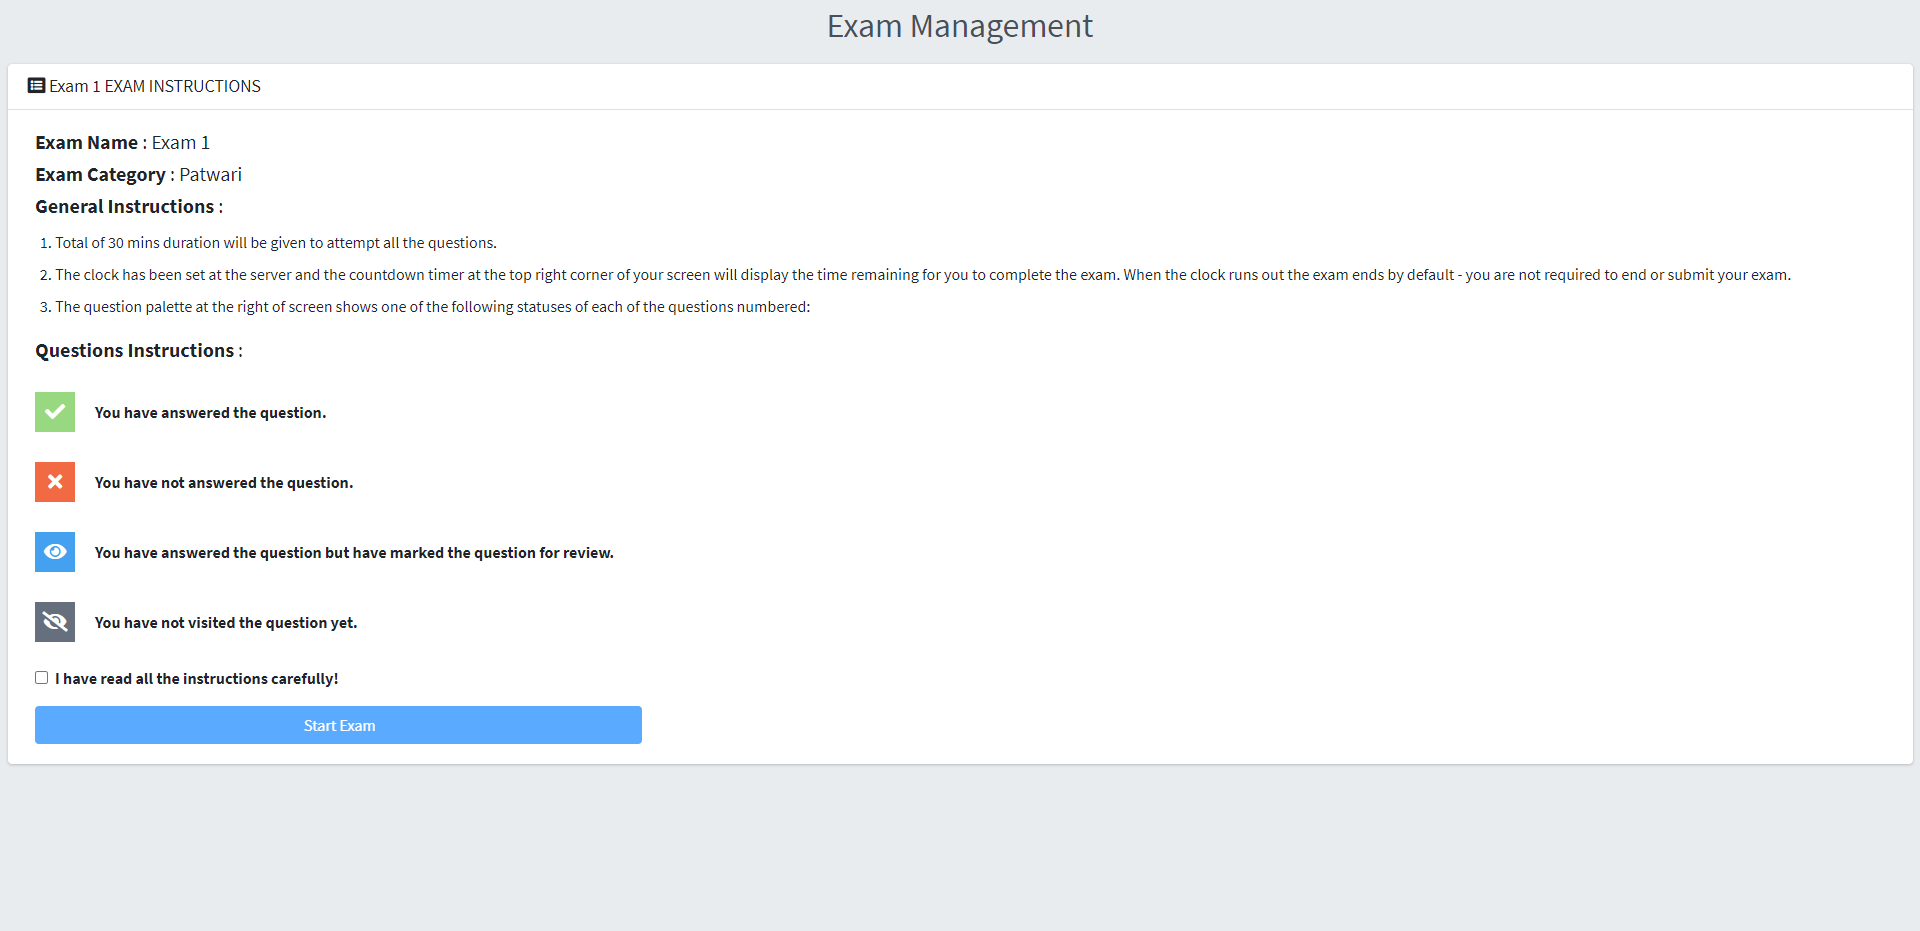
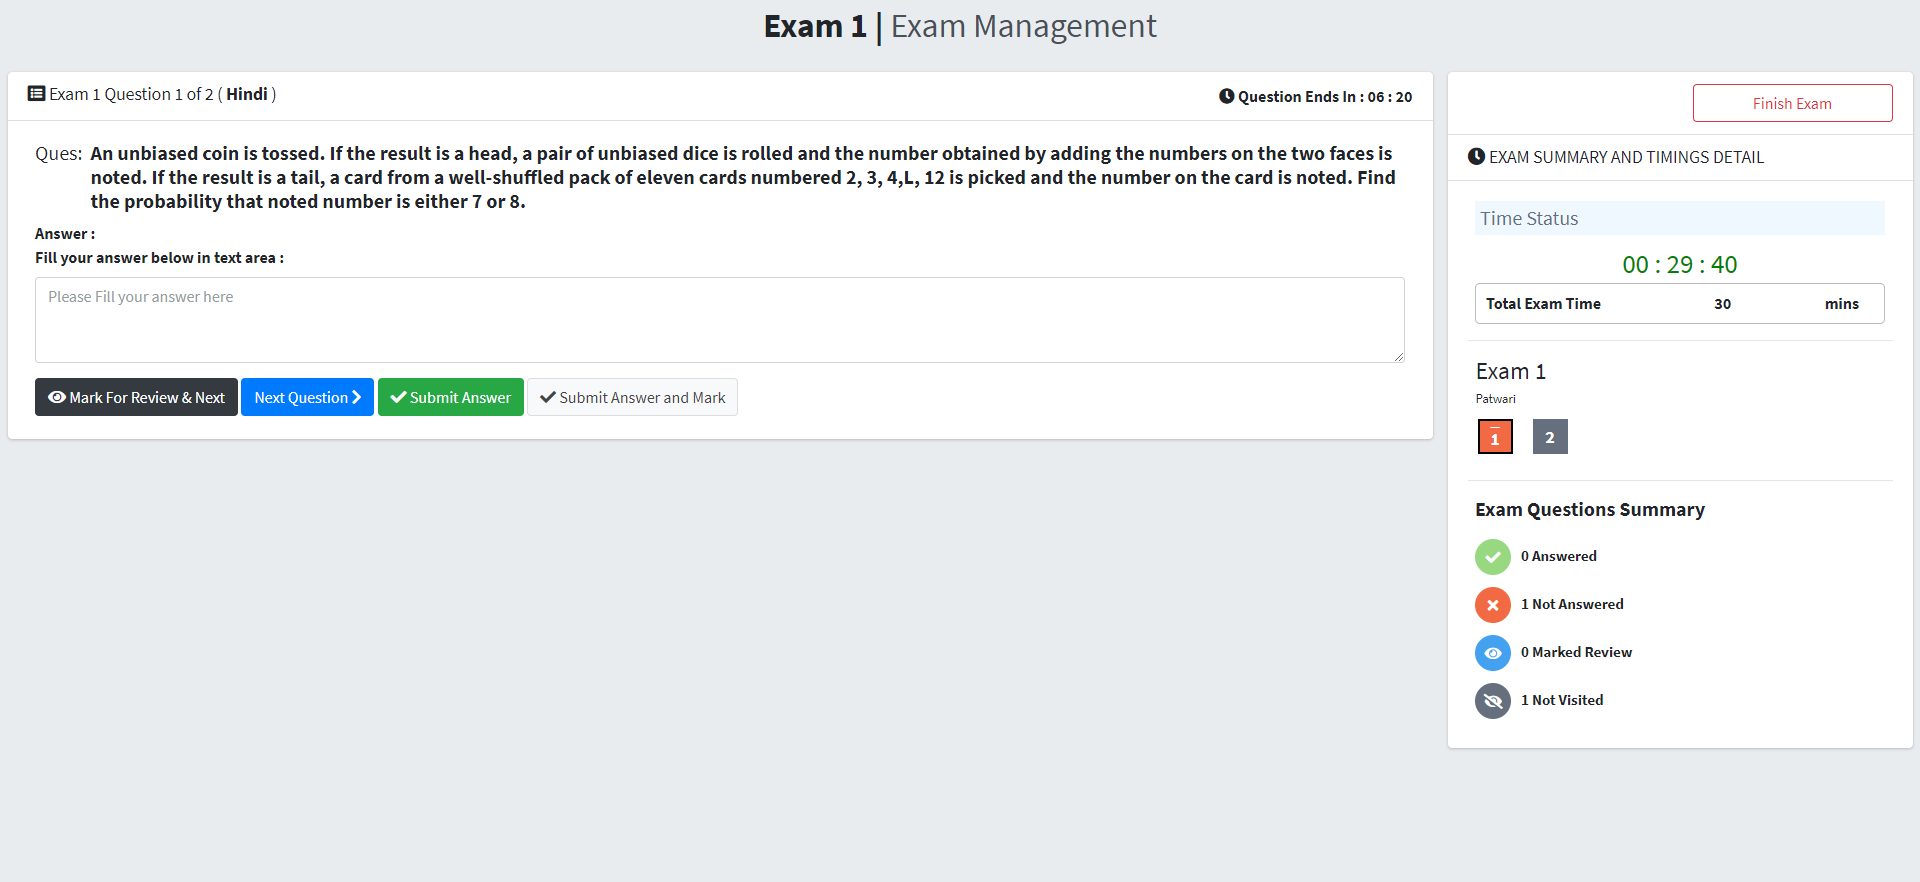
1). After reading the instructions and when start timer is finished, students can attempt the questions.
2). Here, students will find the questions palette and browse the questions and respond to the questions.
1). After the exam is finsihed, students can view the results if this is allowed for this particular exam as set by the admins.
2). Also, students can view the results from the results form by entering the roll number.
If you face any trouble OR required any assistance to set up and configure the plugin, please post your query on Support Forum. We will try our best to resolve our query on the forum.
And your suggestions for more features and improvements for our plugin is really appreciated.
Thanks for reading this documentation.